 This week I have been designing a vRealize Automation 7.2 solution for a customer. One of the things that came out of the solution requirements workshop was the ability for vRA to deploy and potentially manage containers. Whilst I knew it was possible, it encouraged me to look deeper at the technology. Thankfully it wasn’t long before a use case emerged.
The customer in question has dedicated teams for managing separate areas of the IT estate. One of the teams, storage, looks after vSAN – but the virtualisation team is unwilling to give continuous unfettered access to the Ruby vSphere Console built-in to the vCenter Appliance.
Thankfully William Lam released a post last year about using RVC in a container. As great as that is, it leaves the burden of installing and configuring it with the storage administrator.
Let’s go ahead and add that to our service catalog, so that it can be consumed by the admin on-demand for when he needs it.
Other posts in this series:
- Containers
- Networking & security (coming soon)
Getting started
For those who have recently upgraded to vRA 7.2, you will notice the addition of the Containers tab:

The first thing to do is deploy some container hosts. One way to do this is to manually provision them using the Photon OVA straight into the vSphere Client. However, we can leverage the power of vRA straight out of the box and provision directly from the catalog (with a little work).
Please note: the following assumes you’re comfortable with creating/editing blueprints, entitling catalog items and configuring network profiles. If you’re not, I urge you take a look at one of the awesome VMware Hands On Labs, or pick up some reading material.
It is also assumed you have the appropriate permissions in vRealize Automation to perform all the necessary functions. I implement RBAC, hence why some of the screenshots show Incognito mode in Chrome (one admin, one consumer).
Create the template
Download the VMware Photon OVA from:
https://vmware.github.io/photon/#getting-photon
Using your vSphere Client of choice, deploy the OVA to your environment:

Before you start, the CIP plugin for the web client is goosed…
Continue the deployment and power on the appliance when finished. Using the console, perform the following:
- Change the root password (default password is “changeme”)
- Enable SSH
- Configure Docker options, enable and start service
- Configure iptables to allow traffic on the Docker port
Finally, convert the newly deployed machine to a template.
Edit the blueprint
Navigate to the Design tab, and select Blueprints. Select the item you wish to modify and click Edit:

Assuming you have configured your network profiles correctly, select Network & Security and drag the appropriate existing network onto the canvas. For this stage of the design, I am using an external network with a network profile of VLAN30:

Click to select the vSphere machine. Edit the sheet as you see fit. I prefer to increase the maximum instances so I can scale out later on:

Click the Build Information tab, and select the template you created earlier:

Click the Network tab, followed by New. Select the appropriate network for the vSphere machine to join. When done click Finish.
Finally, select your blueprint and click Publish.
Configure the catalog
Create a service for containers (if one doesn’t exist) by navigating to the Administration tab, followed by Catalog Management. Select Services, and then create one and name accordingly . Highlight the service and click Manage Catalog Items:

Click the green plus icon and then select the Photon item you configured above, followed by OK. Ensure the item is entitled accordingly.
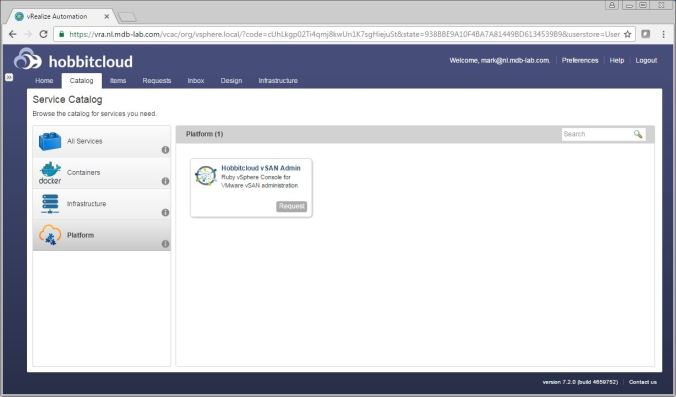
Request from the catalog
Click the Catalog tab, and then request the item you configured previously. Select the number of deployments and click Submit:

Click OK, followed by the Requests tab. Your machine should now start to provision:

Here comes the magic
After a while your Photon hosts will appear on the Containers tab:

Now for the actual container…
On the Containers tab, click Templates. In the search box, type “lamw/rvc” and press return:

Click the drop-down box to the side of Provision and select Enter additional info.
Click the Network tab, and as per William’s blog post, map port 80 to 8010 for the vSAN Observer:

There isn’t much more to configure, so click Save as Template. Edit the template name to be something more meaningful for your consumers.
Hover over the plus icon to the right of the template and click Add Network. Give the network a name and click Save. When back at the template screen, drag the network icon to connect to the newly-created network.
Finally, click the Push icon:

Click the Design tab followed by Blueprints. Click the blueprint you just created followed by Edit to bring up the design canvas:

Click the configure icon to add a description. This will assist consumers when browsing the service catalog:

Click OK to return to the canvas. Select the network, then check the box to mark it as external. Finally click Finish.
Highlight your blueprint and click Publish.
Select your service catalog as before, followed by your chosen service. Click Manage Catalog Items, and add the blueprint you just published. You can also select the Catalog Items tab, followed by the item itself, to configure additional options (different icons etc.). Lastly, don’t forget to ensure your service is entitled.
From the Catalog tab, request the new item. The provisioning status can be monitored from the Requests tab.
Once the container has been provisioned you can access it from the Items tab.
Finishing off
Click on the Containers tab, followed by Resources and then Containers again. The newly provisioned item should appear:

Here you can drill down further into the container to get more information:

Coming up
In this part we deployed a number of Photon container hosts from our service catalog. We then created a container template and deployed it to the hosts.
Whilst this is good, the ability to provision on-demand networks for this would be even better. That will be covered in part 2.

do you assume vlan 30 is a DHCP network so the template gets an ip address? I also noticed you didn’t install any vRA agents on the template? is that by design?
LikeLike
Yes exactly – it assumes DHCP.
I found I didn’t need the vRA Agent, as only the VMware Tools and a customisation spec are needed to inject an IP address.
My blueprints actually use custom properties/groups to select the VLAN…
LikeLike
I’ve deployed minimal photon ISO instance as a catalog item and it’s on the network, can ssh to the host. I’ve configured docker engine per some basic instructions on the web.
systemctl start docker
systemctl enable docker
When I run ps -e | grep docker shows docker shows to me running. The “magic” doesn’t appear 🙂 The photon ISO is running on a set of esxi 6.5 hosts in my vRA 7.2 compute resource. Any logs i could look at to help determine “why” the magic isn’t happening 🙂
LikeLike
If you were to add them manually as hosts does that work?
LikeLike
http://www.vmtocloud.com/how-to-enable-docker-remote-api-on-photon-os/ helped get farther but still can’t import host, SSL certificate error. Is there an end to end doc that covers all this for “us” newbies?
LikeLike
have you tried this in a HA vRA install?
LikeLike
Yup. My installation is eights: two appliances, two web, two manager, two DEM/DEO. All load-balancing done by a pair of F5s.
LikeLike
Error connecting to https://192.168.0.5/v1.19 : Importing ssl certificate failed for server: https://192.168.0.5:2375
This is the error I get. I can telnet to 2375, I can browse and retrieve the JSON. Stay tuned, I got a GSS case open.
LikeLike
Let me know… interested to hear the outcome of this!
LikeLike
Got it. I’ll blog details but between your blog, these two links I got my template working. One thing in the vRA console, I was typing or https was getting added. I typed http://x.x.x.x:2375 and could verify.
There is a few ideas.
http://www.vmtocloud.com/how-to-enable-docker-remote-api-on-photon-os/
Showed how to adjust the docker networking.
https://support.zenoss.com/hc/en-us/articles/203582809-How-to-Change-the-Default-Docker-Subnet
Known issue, I applied this hotfix.
https://kb.vmware.com/selfservice/microsites/search.do?language=en_US&cmd=displayKC&externalId=2148212
PM if you want the SR case or @steveschofield on twitter
LikeLike
still searching for how to permanently change the default docker networking from 172.17 to something else.
LikeLike
Notes from a case I had. Passing long. I take no credit 🙂
Photon OS use systemd-networkd to manage the network. Here is the external documentation on how to setup a bridge with systemd-networkd: https://wiki.archlinux.org/index.php/Systemd-networkd#Bridge_interface
Please try to do the following steps:
# cd /etc/systemd/network
# vi 10-static-docker0.netdev
[NetDev]
Name=docker0
Kind=bridge
# vi 10-static-docker0.network
[Match]
Name=docker0
[Network]
Address=192.168.3.0/24
# chmod 755 10-static-docker0*
# systemctl restart systemd-networkd.service
# systemctl restart docker
Modify whatever you want, I left 192.168.3.0/24 as that will work in my network. Hope this helps someone.
LikeLike
Importing ssl certificate failed for server i am having this problem when trying to connect to photon controller. Any idea?
LikeLike