 A few weeks ago, I joined the VMware Cloud on AWS VMUG Community and entered a contest to win one month of free Single-Host SDDC. I was lucky enough to be selected as one of the winners. Before I start with the post, I would like to thank the team for selecting me and giving me the opportunity to test this solution.
This first post will cover two parts, creating a SDDC for the first time and configuring Hybrid Linked Mode.
If you have your SDDC already set up you may skip Part 1 and jump straight to Part 2.
Part 1: Setting up SDDC
The process of creating your first SDDC is very straight-forward and only takes a couple of minutes to finish.
To start, click on Create SDDC: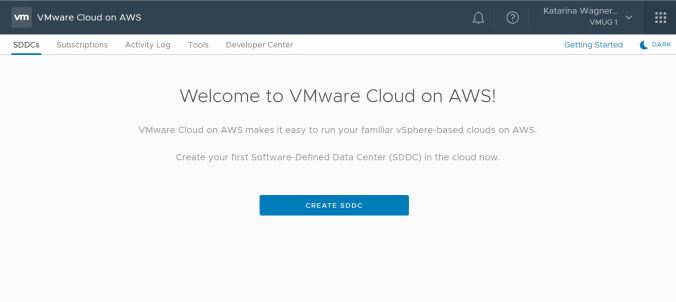
Choose your AWS Region, preferably one that is closest to you, and enter your SDDC Name: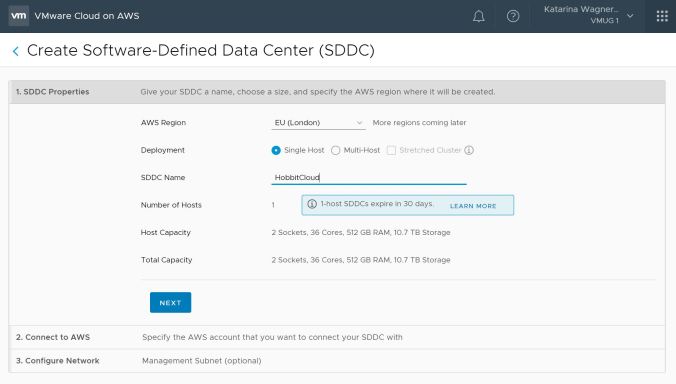
In the next step, connect SDDC to your AWS account by entering the account ID: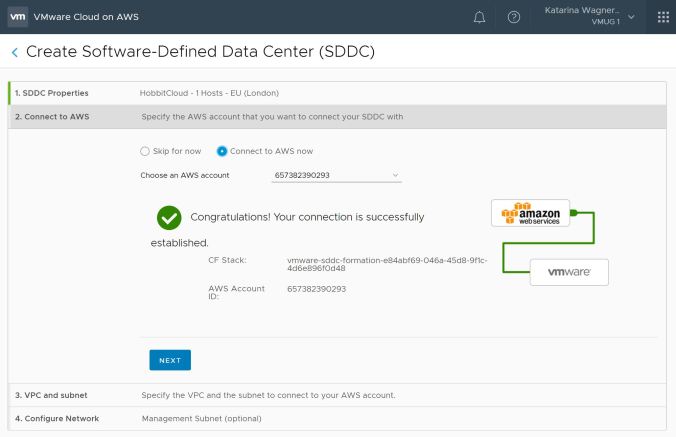
Select your VPC and Subnet from the drop-down menu: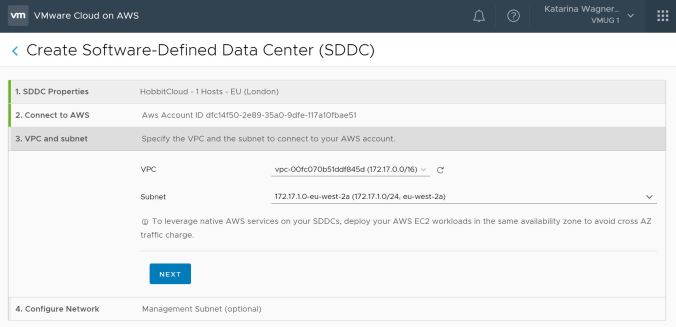
Define a Management Subnet you would like to use. Make sure it does not overlap with any of your networks. Default management subnet 10.2.0.0/16 will be selected if you do not enter any subnet:
Deployment will start once you click on Deploy SDDC and will take approximately 2 hours to complete: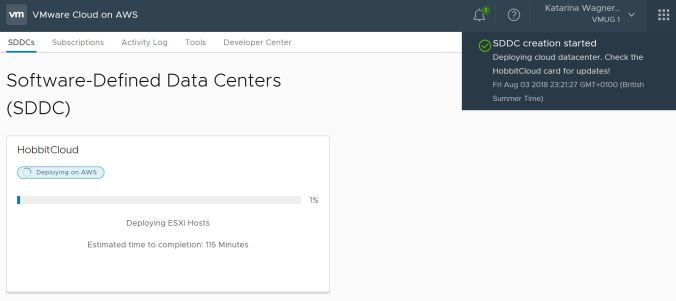
Once finished, you will see your newly deployed SDDC in the list: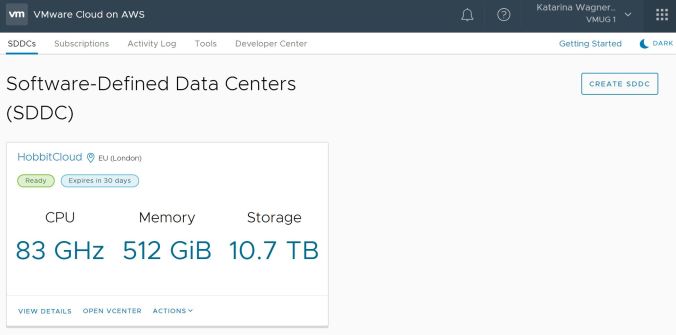 At this point, you can access your vCenter by clicking on Open vCenter. As it is the first time you are accessing it, you will be asked to open access to the management gateway. At this stage, you can click on Internet Firewall rules. This will open HTTPS traffic to vCenter from Any location. We will configure Management Gateway VPN in the next section.
Part 2: Configuring Hybrid Linked Mode
First thing we need to do before enabling Hybrid Linked Mode is to configure Management Gateway IPsec VPN to our On-Premises environment.
To do so, click on Network tab under your SDDC and expand Management Gateway IPsec VPN and click on Add VPN.
You will have to fill in following details:
- VPN name – define a name of your VPN
- Remote Gateway Public IP – enter Public IP of your On-Prem gateway
- Remote Networks – enter your On-Prem networks
- Encryption – select AES 256
- Perfect Forward Secrecy – select Enabled
- Diffie Hellman – select your preferred level of secure key exchange that matches your On-Prem VPN settings
- IKE Version – has to match your On-Prem VPN settings
- SHA Version – select SHA_256
- Pre-shared Key – enter a strong password

After you click Save, download the configuration file. This will be used to configure On-Prem VPN. At this point I would like to thank HobbitCloud’s Chief Network Architect for configuring the On-Prem VPNs on Junipers. More details on how that needs to be configured will follow.
Next step is to configure Firewall rules. You can either add them manually one by one or use the Firewall Rule Accelerator feature that adds them for you. If you have more than one Remote Network, make sure to add rules for all:
Once the On-Prem VPN has been set up, you should see your IPsec VPN as Connected. If it’s not the case, you may try to disable and re-enable it using the Actions menu on the right side:
As we are trying to configure HLM to a Multi-site environment, we need to make sure we configure Management VPN for all sites before proceeding. Repeat the steps to set up a second VPN:
Please note that some settings may vary depending on the capabilities of your On-Prem equipment.
Once saved, download the second configuration file to configure the On-Prem VPN and add required firewall rules. You should now see both VPNs connected: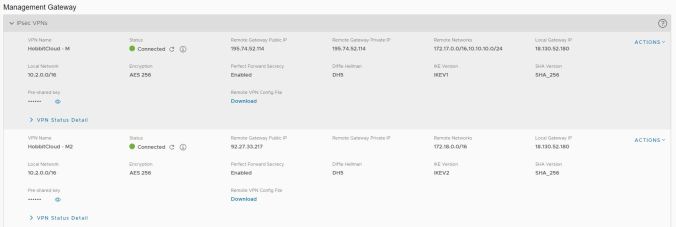
Last step we need to do in our SDDC network configuration is to change DNS to point to On-Prem DNS servers. You must also change the vCenter FQDN Resolution to Private IP resolvable from VPN. You can select this option from a drop-down menu:
Make sure to only proceed with this step once the VPNs are connected.
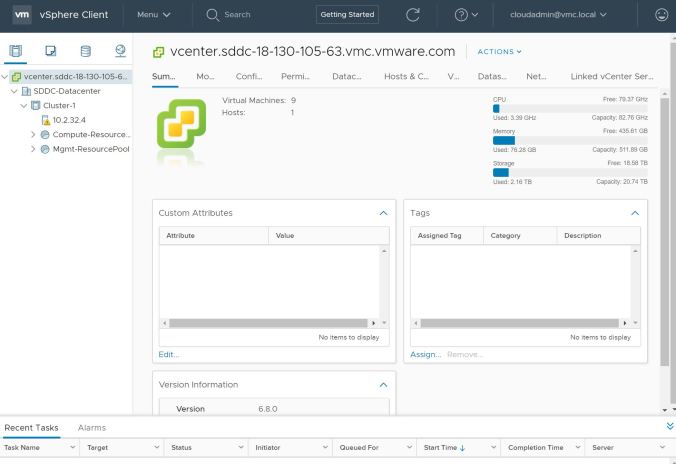
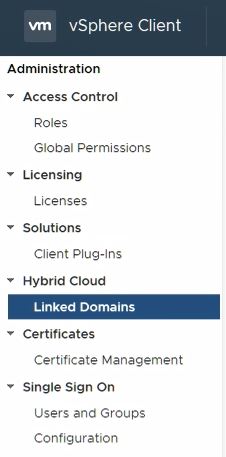
You can now login to vCenter from your On-Prem Network using the cloudadmin@vmc.local account. To configure HLM, click on Menu -> Administration -> Hybrid Cloud and select Linked Domains:
First thing we need to do is to configure Identity Source for our On-Prem Domain: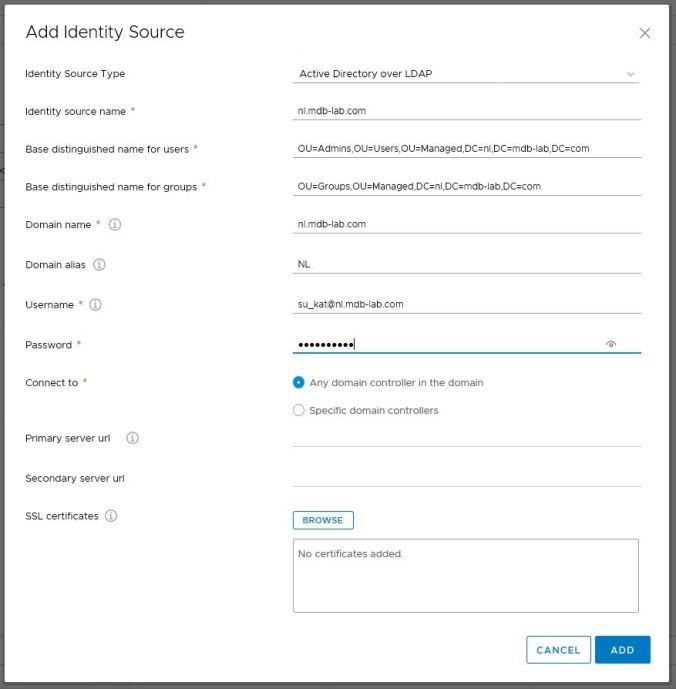
To Connect to On-Prem vCenter Server, enter your primary Platform Service Controller and SSO admin details.
Once the Identity Source has been added, you will be able to add your domain group to Cloud Administrators: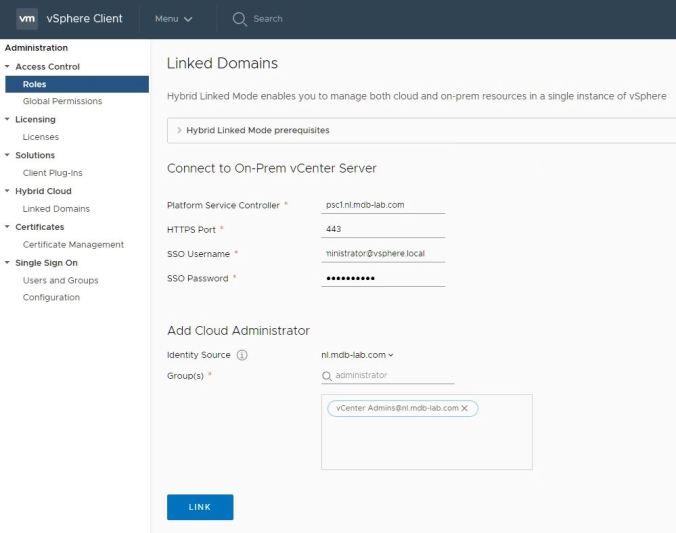
Click on Link, accept the certificate and wait for the domain to be linked.
You can now log off from vCenter and login again using your domain credentials: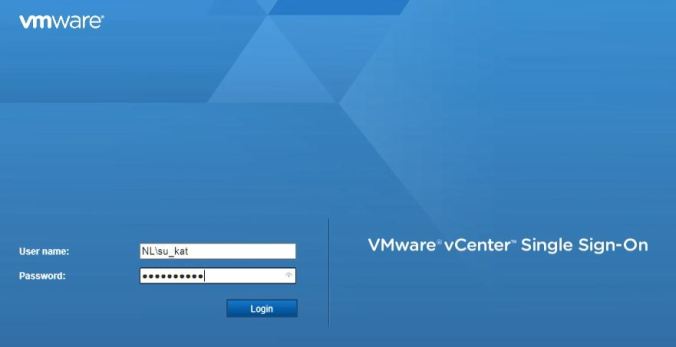
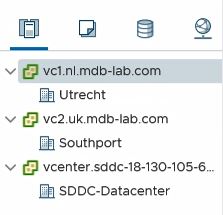
You should now be able to see all your vCenters linked:
That concludes this post, I hope you have enjoyed it. There will be more topics covered in upcoming posts.
In case of any questions, you can find me on Twitter.
Thanks!

Pingback: Newsletter: August 18, 2018 – Notes from MWhite
Pingback: The #VMwareSummerReading List - Nicola Marco Decandia