My VCAP5-DCA study resources

VCAP-DCA

This is a list of resources I used to pass the VCAP5-DCA (VDCA550) exam.

The first place to star is the exam blueprint.  This really is the go-to resource for everything you can expect to be tested on.

Exam blueprint (v3.3)
http://mylearn.vmware.com/lcms/web/portals/certification/VCAP_Blueprints/VCAP5-DCA-VDCA550-Exam-Blueprint-v3_3.pdf

VMware VCAP5-DCA Official Certification Guide
http://www.amazon.co.uk/books/dp/0789753235

Chris Wahl’s VCAP5-DCA Study Sheet
https://drive.google.com/file/d/0B8JynlqprJW2c1BXSURNUDFsZXM/view?pli=1

Nick Marshall’s vBrownBag VCAP5-DCA Series
https://www.youtube.com/watch?v=c0TJ1rQudTo&list=PLgKUP8MebCghDhhtd1hl3h2cqYqL_G2Rw

VMworld 2014 Breakout Sessions
http://www.vmworld.com/community/sessions/2014/
I especially found the following helpful:
STO2197 – Storage DRS- Deep Dive and Best Practices
NET2745 – vSphere Distributed Switch – Technical Deep Dive
INF2427 – DRS – Advanced Concepts, Best Practices and Future Directions
BCO2701.1 – vSphere HA Best Practices and FT Technology Preview
INF2311.1 – vCenter Server Architecture and Deployment Deep Dive

VMware’s Hands-on-Labs
http://labs.hol.vmware.com/

VMware vSphere 5.1 Clustering Deepdive (Epping/Dennerman)
http://www.amazon.co.uk/VMware-vSphere-5-1-Clustering-Deepdive-ebook/dp/B0092PX72C

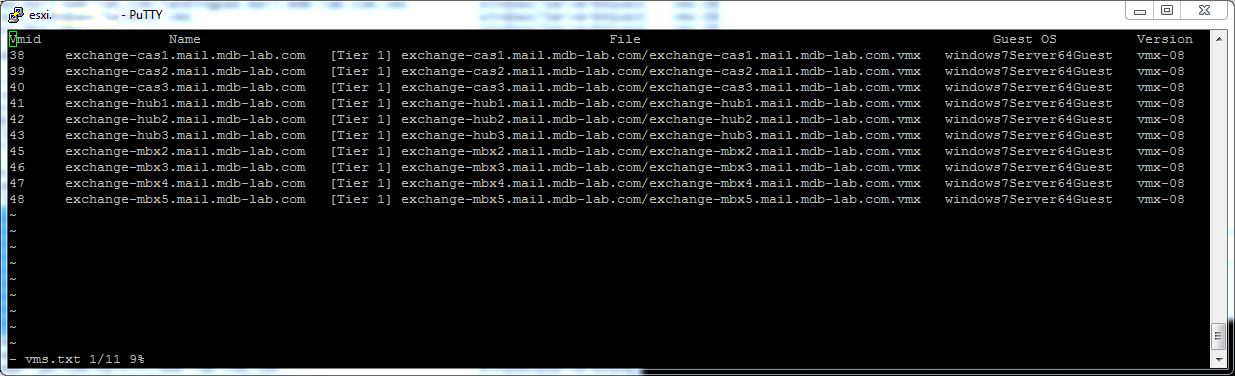
Josh Andrews VCAP5-DCA Practice Environment
http://sostechblog.com/2015/03/05/vcap5-dca-practice-environment-test-track-v-550-lab-on-a-laptop-ii/

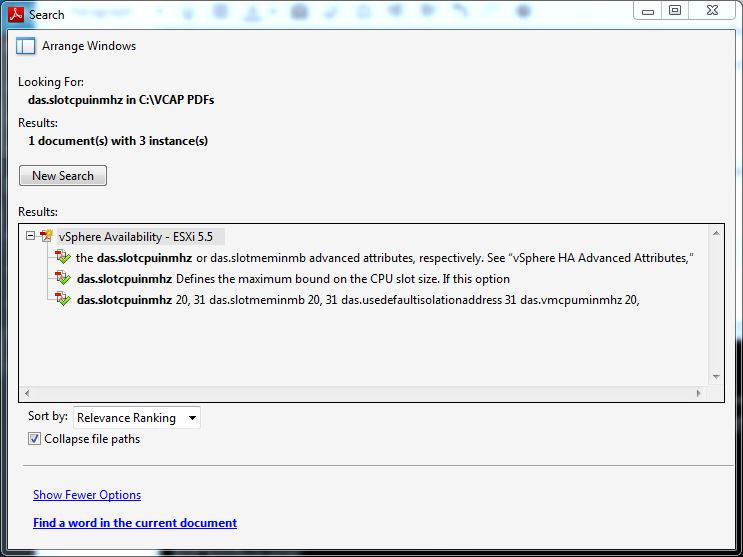
Together with the above I used a number of the VMware PDFs, namely:

vsphere-esxi-vcenter-server-55-command-line-interface-concepts-examples-guide.pdf
vsphere-esxi-vcenter-server-551-storage-guide.pdf
vsphere-esxi-vcenter-server-55-availability-guide.pdf
vsp_powercli_55_usg.pdf

Oh, and maybe a few of these too… 🙂

Red Bull

Reset root lockout on VMware vCenter Operations Manager 5.8

A few days ago I had the pleasure of fixing a severely hosed vCenter Operations Manager box.  After resolving all of the issues, the last thing to do was to install the latest update.

The intention was not only to bring the version from 5.8.2 up to 5.8.4, but also to update the underlying SUSE install to SP3.  However to do this you need root access, and somewhere along the way I’d fat-fingered the password one too many times and locked the root account out.

Whilst I was confident it would unlock after a period of time, no matter how long I left it (admittedly not twenty four hours) it still refused to unlock.

With being an RHEL fanboi I’m not familiar with SUSE, but luckily I still had console access by way of the Admin account.

The unlock was actually trivially simple.  Logged in as Admin, use:

sudo pam_tally2 --user=root --reset

And that was it – I was back in. After that I copied the .pak upgrade file over using SSH and initiated the OS upgrade:

/usr/lib/vmware-vcops/user/conf/upgrade/va_sles11_spx_init.sh /data/VMware-vcops-SP2-1381807.pak

This did the following:

  1. Stop vCenter Operations Manager services
  2. Copy the .pak file to the Analytics VM
  3. Update the Analytics VM
  4. Update the UI VM

After a while both UI and Analytics VMs came back and the upgrade was complete.

VCAP5-DCA… passed!

VCAP-DCAToday I received the news… I passed the VCAP5-DCA exam.  It was tough, but it’s certainly achievable.

Now that it’s behind me, and before I begin the journey to VCAP5-DCD, I thought I would take a few moments to document my journey.

As you’ve no doubt read elsewhere on the web, time is not your ally.  As the blueprint will tell you (section 1.2), the exam “consists of approximately 23 live lab activities” … meaning it is task-based.  You are expected to perform these tasks at a fast pace… so if you don’t know the answer to something you won’t have much any time to stumble through the PDFs.

The blueprint is the first and last word on what you can expect from the exam – if it’s in there then it’s fair game.  So whilst I felt I had most of this covered, there were grey areas I needed to brush up on like vCO.

After I read the blueprint, I chose a multitude of resources to help me study.  These can be found here.

On the day of the exam I wasn’t apprehensive.  I decided to treat it more like an afternoon at work, and to try and enjoy it (after all, I do enjoy what I do for a living).  I arrived at the testing centre thirty minutes early, and after all the Pearson formalities were dispensed with I got to work.

My game plan was to look at each question for no more than a couple of seconds, and if it looked like I could complete the task relatively quickly then I would attempt to.  If not, I would move forward to the next and come back to it.

The plan worked.  I got through the exam with all but one of the questions answered… and no amount of time was going to solve that one.

As VMware made me (and everyone else) sign an NDA before sitting the exam, I obviously can’t reveal anything about it.  However, I can say that the following tips helped me enormously:

esxcli syntax

Unless you’re Rainman, there’s not much point in trying to remember esxcli‘s myriad of commands.  Use the command list function, and grep for a specific target. For example, syslog:

esxcli esxcli command list | grep syslog

Will give you the following:

esxcli1

This tells you that to set a parameter you need to start in:

esxcli system syslog config set

That example was taken from vCLI, but the vMA operates the same.  Note that in local mode (when esxcli operates on the host) you don’t have to specify –server or credentials.

Session file

Use a session file with esxcli… this will save lots of time:

esxcli --server esxi1.uk.mdb-lab.com --username=root --savesessionfile esxi1 system

Then the next time you connect use -f to specify to session file:

esxcli --server esxi1.uk.mdb-lab.com -f esxi1 system version get

Will give you:

esxcli2

Advanced Search

Finally, as the DCA is an open-book exam, be familiar with the Advanced Search function.

Open one of the PDFs, then navigate to Edit —> Advanced Search.  Select the All PDF Documents in radio button and navigate to the folder containing the VMware documents.

search1

Enter your criteria and click Search:

search2
The PDF reader you have access to on the exam may or may not be Adobe Reader. However, it still has the ability to search through multiple PDFs using the technique above.

Practice practice practice!

All the reading in the World will not help if you can’t execute all the tasks in a real environment very quickly.  Every day I put in at least two hours in the lab, using a combination of the GUI, CLI and PowerCLI.

As I said, the exam is tough but if you know your stuff it is achievable.

Now onto the VCAP-DCD!

Man down… when you need to DR your DR

Last week I received the following error on my DR ESXi host:

Configuration-Issue-Lost-connection-to-the-device

The host in question is a Dell PowerEdge R710, and this indicated a hardware failure of some sort.

mpx.vmhba32:C0:T0:L0 is an 8GB SanDisk SD card containing the ESXi 5.5 boot partitions.  With this gone, it meant the host would still live, but any changes wouldn’t be saved.  It was also unlikely that the host would boot up again.

Sure enough this turned out to be the case.  Three times out of four the server would hang at the BIOS.  To remedy this I disconnected the SD card reader and ordered a replacement.

Unfortunately this turned out to be a red herring, as the new SD card reader failed to be recognised, as did the internal USB stick.  After further testing, I decided it was the control panel (a daughterboard that the SD card reader, internal USB and console port plug into) that was faulty.  After replacing that, the server booted normally into ESXi.

The total downtime was about ten days, which meant when the remote vCenter and vSphere Replication servers came back up there was a lot of data which needed to be replicated.  This subsequently hammered my web connection, so much so that I couldn’t even bring up the vCenter Web Client to monitor how the replication was going.

To find out I needed to switch to the command line.

On the source host I used the following command to get the list of VMs and their associated VM IDs:

vim-cmd vmsvc/getallvms

This give an output similar to:

VM IDs

With each VM ID number, I then used the following command to get status of each replication:

vim-cmd hbrsvc/vmreplica.getState vmid

That told me exactly how much had replicated and how much was left to do.  With a total of thirteen VMs  to replicate, that was going to take a while!

Replication state

The BusyBox shell on ESXi is quite limited, but a loop such as:

for i in `seq 38 43`; do vim-cmd hbrsvc/vmreplica.getState $i; done | grep DiskID

Gives me a basic overview on how my mail replications are going:

For loop

In the long-run this hasn’t caused too much of an issue, however it has made me think about moving my DR needs to vCloud Air

Compress thin-provisioned VMDKs even further

Here in the lab I’m running out of resources to run all my VMs concurrently on the one host.  Rather than add another physical host at this site (or switch off some VMs), and with long-distance vMotion now available in vSphere 6.0, I decided to place another at my secondary site in the UK.

Before the move to vSphere 6.0 (I’m currently studying for my VCAP so want to stay on 5.5 for the time being), I decided it would be best to migrate my 14-host Exchange 2010 environment over the secondary site, and setup SRM in the process.  However before I could do that I needed to setup vSphere Replication to get the actual VMs over.

With the VPN to the secondary site not being the quickest, it was important to compress my already thin-provisioned VMs down as much as possible.

It’s an old one, but always worth doing in this type of scenario.

On each VM, I downloaded Mark Russinovich’s SDelete and ran it on each of the Windows drives:

sdelete -z

This balloons each VMDK up to its maximum size, but don’t worry about that for now.  When it finished, I powered down each VM and switched to the ESXi host console (using SSH) and ran:

vmkfstools -K /vmfs/volumes/path-to-VM/VM.vmdk

The important thing here to remember is to target the VMs normal VMDK, not the one ending in “-flat.vmdk”.

After a while it finished and freed up a lot of space, ready to be replicated using vSphere Replication 5.8!


Each VM still took two days though 😦

Recovering damaged VMFS partitions

Last year a client suffered a power outage at one of their major sites.  Unfortunately the Powerchute installation I had configured on a vSphere vMA didn’t work as expected, and all hosts, storage and networking equipment died when the UPS ran out of juice.  This however, was only the beginning of what was to become a very long day.

When power was restored, a member of the Operations team brought all the kit back on-line, but unfortunately the SAN controllers came up before the expansion arrays… therefore marking them as dead.  When the ESXi hosts came back up, they were missing quite a few LUNs, and got visibly upset.

Despite all the storage controllers and arrays being online, ESXi refused to recognise any of the partitions and only offered the ever-helpful option of adding new storage (and therefore destroying what was already there).  That’s when Ops decided to escalate the issue.

After calling VMware support, the prognosis was not good… the data was lost and we had to restore from backup.  Knowing the client would not be happy with this, I decided to step-in and take over.

I didn’t believe the data was lost, but merely needed a little nurturing to bring it back to life.  First, the storage had to be brought back in the right order:

  1. Shutting down all ESXi servers
  2. Disconnecting controller B fibre
  3. Disconnecting controller A fibre
  4. Shutting down enclosure 2
  5. Shutting down enclosure 1
  6. Shutting down controller B
  7. Shutting down controller A

If the SAN controllers can’t see all the arrays, then the hosts have no chance of seeing the LUNs.

Then at two minute intervals:

  1. Reconnecting controller A and B fibre
  2. Powering up enclosure 2
  3. Powering up enclosure 1
  4. Starting controller A
  5. Starting controller B
  6. Powering on ESXi host 1

Rescanning the LUNs still gave me nothing, so I SSH’d onto the host and listed the disks it could see using:

esxcli storage core path list | grep naa

This gave me two devices:

naa.60080e50002ea8b600000318524cd170
naa.60080e50002eba84000002de524cd0b2

Then I listed the partition table (on each disk) using:

partedUtil getptbl /vmfs/devices/disks/naa.60080e50002ea8b600000318524cd170

This showed as empty (ie. no entry starting with “1” or the word “vmfs” anywhere) – not good.  I then checked for the beginning and end blocks on each disk (thank you VMware for the following command):

offset="128 2048"; for dev in `esxcfg-scsidevs -l | grep "Console Device:" | awk {'print $3'}`; do disk=$dev; echo $disk; partedUtil getptbl $disk; { for i in `echo $offset`; do echo "Checking offset found at $i:"; hexdump -n4 -s $((0x100000+(512*$i))) $disk; hexdump -n4 -s $((0x1300000+(512*$i))) $disk; hexdump -C -n 128 -s $((0x130001d + (512*$i))) $disk; done; } | grep -B 1 -A 5 d00d; echo "---------------------"; done

I then listed the usable sectors:

partedUtil getUsableSectors /vmfs/devices/disks/naa.60080e50002ea8b600000318524cd170

That came back with two numbers.  I needed the large one (4684282559).  I then rebuilt the partition table using:

partedUtil setptbl /vmfs/devices/disks/naa.60080e50002ea8b600000318524cd170 gpt "1 2048 4684282559 AA31E02A400F11DB9590000C2911D1B8 0”

So to recap,

naa.60080e50002ea8b600000318524cd170 = disk device
2048 = starting sector
4684282559 = end sector
AA31E02A400F11DB9590000C2911D1B8 = GUID code for VMFS

I then mounted the partition:

vmkfstools –V

After repeating the above command for the second disk, ESXi host 1 then saw both partitions.  I could then bring up all the VMs and the remaining ESXi hosts.

Bullet…. dodged.