 A common challenge facing enterprise deployments of vSphere is configuration drift. When the hardware or software configuration changes, manageability becomes increasingly difficult. This in turn results in higher support costs.
In this article I explain how to use the tried-and-tested vSphere Auto Deploy technology to deploy eight ESXi 5.5 hosts in stateless mode. The hosts have no hard disks, internal USB or SD cards installed, nor will they be booting from SAN.
The hosts will eventually be used for a VMware Horizon View deployment, and will be managed by a separate cluster.
Together with this I explain how to user vCenter alerting to notify you of configuration drift, and also how a simple reboot can patch a host to an updated version.
ESXi installation options
When provisioning ESXi hosts a number of options are available, namely:
- Installed
- Embedded
- Stateless
As I’m sure most are aware, Installed is the version you install on a local hard disk or Boot-from-SAN LUN. Typically you download the ESXi software from VMware and install it yourself. This can either be an interactive, scripted, or a stateful install (where Auto Deploy is also used).
The Embedded install option comes direct from the hardware vendor, and is often customised with their drivers and software. There is no deployment to this as this has already been done for you.
It is interesting to note that when you perform an ESXi installation (Installed) yourself to either an internal USB or SD card, that this is considered as an Embedded installation (you can verify this by using the esxcli-info -e command. Look for “visor-usb”).
The last option, Stateless, is provisioned using Auto Deploy. This in turn comes in three options:
- Stateless
- Stateless Cached
- Stateless Installed
With Stateless, the host receives its image over the network using Auto Deploy. The image is loaded into memory, and nothing is saved locally.
When a host uses Stateless Cached, the image is again received over the network, but a copy is cached to a local disk. The host continues to boot from the network, but in the event of an image not being available (eg. a DHCP / PXE / TFTP failure) then the host is able to boot from the cached version.
An administrator can use Auto Deploy to configure a host to receive an image over the network, save it locally, and then continue to use it. Auto Deploy is then no longer used. In this scenario, the installation behaves in the same way as an Installed installation. This is Stateless Installed.
Stateless AutoDeploy isn’t ideal for all situations. For example, at the company I work for the management functions (DNS, DHCP, AD, vCenter) are often segregated from the hosts they manage. If you…
When using Stateless, it is important to remember that there is no scratch partition, so a few things have to be configured in order for a host to work as expected. These include VMware Tools, logging and the dump collector.
Assumptions
The following scenario assumes you have the following components installed and configured:
- VMware vCenter (Windows)
- DHCP server
- TFTP server
- PowerCLI
To demonstrate how to upgrade a host to the latest revision, I will be using two ESXi 5.5 builds, namely Update 2 and Update 3.
Let’s get started!
DHCP
To begin with we need to configure two DHCP options, namely number 66 (Boot Server Host Name) and 67 (Bootfile Name).
Regular readers of my blog will know I’m more focused on command-line then that of the GUI, so to configure these I will be using the CLI. If this is not possible for you, feel free to use the tool of choice.
If you are using a Windows DHCP server, use the two following commands (substitute accordingly):
netsh dhcp server localhost scope 192.168.146.0 set optionvalue 66 STRING 192.168.146.12
netsh dhcp server localhost scope 192.168.146.0 set optionvalue 67 STRING undionly.kpxe.vmw-hardwired
If you are using an ISC dhcpd server, add the following to dhcpd.conf:
option tftp-server-name 192.168.146.12
option bootfile-name "undionly.kpxe.vmw-hardwired"
This creates two options – one to tell the DHCP client to get their bootfile from the vCenter (192.168.146.12), and the other what the file is (undionly.kpxe.vmw-hardwired).
TFTP
In my environment I have installed the SolarWinds TFTP server. Click File
and then Configure:
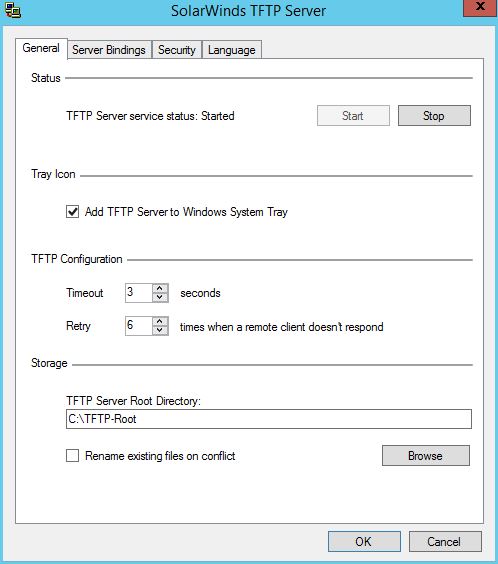
Click Start.
Make a note of the folder listed under TFTP Server Root Directory (in my case it is C:\TFTP-Root).
Click OK.
Auto Deploy
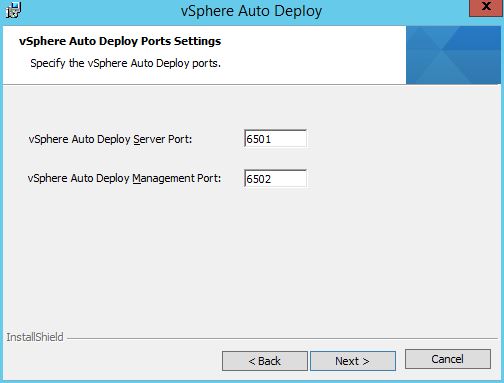
Insert the VMware vCenter DVD or attach the ISO. From the menu, choose vSphere Auto Deploy.
Click OK.

Click Next >

Click I accept the terms in the license agreement, followed by Next >
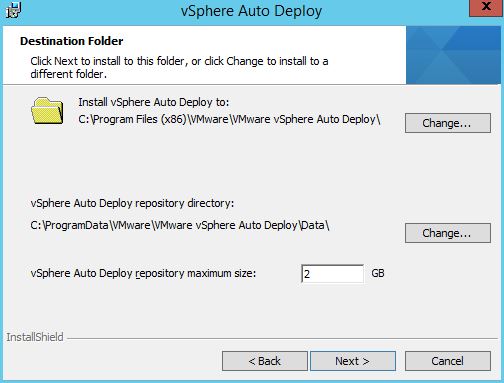
Click Next >
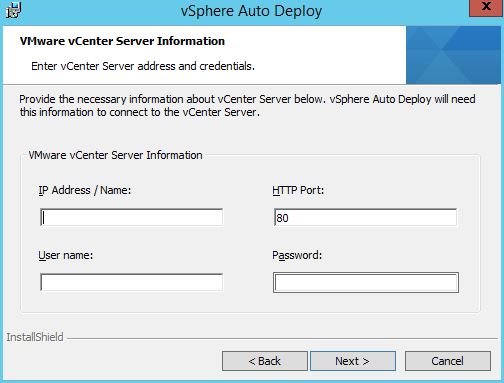
Complete the vCenter details and click Next >
When the dialogs appears asking if you trust the SSL certificate, click Yes.
Click Next >

Click Next >

Click Install.

Click Finish.
Logon to your vCenter Web Client and navigate to vCenter > Manage > Settings > Auto Deploy:
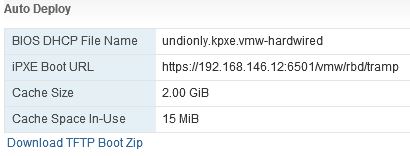
Click Download TFTP Boot Zip.
Extract the contents of the zip file to the location shown above (eg. C:\TFTP-Root).
Image Builder
On your workstation, open PowerCLI.
Set the execution policy:
Set-ExecutionPolicy Unrestricted
Create a depot folder:
mkdir C:\Depot
cd C:\Depot
Copy across ESXi 5.5 Update 2 offline bundle to C:\Depot and then add it:
Add-EsxSoftwareDepot C:\Depot\update-from-esxi5.5-5.5_update02.zip
Verify the images are there:
Get-EsxImageProfile | ft Name
You should see four profiles – two with VMware Tools, two without. Of those without, one has an extra “s” to identify it as a security update. We want the other (in our case, ESXi-5.5.0-20140902001-no-tools).
Use a variable to specify the image:
$img = Get-EsxImageProfile -Name "ESXi-5.5.0-20140902001-no-tools"
When your ESXi hosts boot from DHCP they will receive an IP address and the generic boot menu. However, as no deploy rules are in place to match the host to an image profile nothing will happen.
Connect to the vCenter using the following code (substitute as necessary):
# Variables
$vc = "vc2.uk.mdb-lab.com"
$credential = Get-Credential

Connect-VIServer $vc -Credential $credential
Assign a variable for your cluster:
$MyCluster = Get-Cluster "London_Cluster"
Create a new deploy rule to match any host that boots into your specified DHCP range. In the following example, I have created a DHCP range of 192.168.146.110 – 192.168.146.120 and a rule to match:
$deployrule = New-DeployRule -Name “5.5 Update 2” -Item $img,$MyCluster -Pattern “ipv4=192.168.146.110-192.168.146.120″
The image will now upload to the Auto Deploy repository. This can take a while.
There are two types of deploy sets – the Working Set and the Active Set. To view the latter, use:
Get-DeployRuleSet
This should show as empty at this stage. Add the deploy rule we created earlier:
Get-DeployRule -Name "5.5 Update 2" | Add-DeployRule
Now if we view the active ruleset again we should see it added:

As it stands we now have a host which will boot with an ESXi image installed. Now we have to configure it.
In part 2 we’ll create a profile that we’ll use to configure the other hosts. We’ll also pre-populate vCenter with some answers, so that hosts can boot up straight out of the box and start working.
