 In part 1 of this short series we discussed configuration drift with regards to ESXi hosts. In this part, we complete the series by configuring answer files, host profiles, and various other settings needed to successfully Auto Deploy ESXi hosts.
Answer File
When a host boots using Auto Deploy, it will be appear in vCenter in maintenance mode. This is because there are a number of questions regarding IP addresses which need to be answered. To do this, download Daniel Hiltgen’s script at https://communities.vmware.com/thread/328034 and adjust it to suit your needs.
Create a CSV file like the following to use with the script (substitute accordingly):
00:00:c9:a0:00:a0,ESXi-5.5.0-20140902001-no-tools-virtualhobbit,London_Cluster,Management-management,192.168.146.110,255.255.255.0,vMotion-vmotion,192.168.85.1,255.255.255.0
00:00:c9:a0:00:a1,ESXi-5.5.0-20140902001-no-tools-virtualhobbit,London_Cluster,Management-management,192.168.146.111,255.255.255.0,vMotion-vmotion,192.168.85.2,255.255.255.0
If you have extra VMK port groups (such as for Fault Tolerance), you will need to add these to the CSV and amend the script slightly.
DHCP
On your first ESXi host, find the MAC address for the first network card. Using this, create a reservation in DHCP for the host. If you are using a Windows DHCP server, use the two following commands (substitute accordingly):
netsh dhcp server localhost scope 192.168.146.0 add reservedip 192.168.146.110 0000C9A000A0 esxi1.uk.mdb-lab.com
netsh dhcp server localhost scope 192.168.146.0 add reservedip 192.168.146.111 0000C9A000A1 esxi2.uk.mdb-lab.com
If you are using an ISC dhcpd server, add the following to dhcpd.conf:
host esxi1.uk.mdb-lab.com {
hardware ethernet 00:00:c9:a0:00:a0;
fixed-address 192.168.146.110;
}
host esxi2.uk.mdb-lab.com {
hardware ethernet 00:00:c9:a0:00:a1;
fixed-address 192.168.146.111;
}
In the above examples, I have create two reservations for esxi1.uk.mdb-lab.com and esxi2.uk.mdb-lab.com.
Repeat the above steps for the remaining servers. Lastly, power on the first ESXi host.
VMware Tools
As mentioned previously, in order to reduce the network bandwidth when booting stateless hosts, it is important to use an ESXi image which doesn’t contain the VMware Tools. However if that is the case, how do you provide the tools to virtual machines?
The solution is to create a central repository for the tools which is stored on a datastore which all hosts can access. We then use an advanced configuration parameter to … , and then finally update the symlink on each host to point to this location.
Open PowerCLI, then choose a datastore that is accessible by all hosts (substitute accordingly):
$ds = Get-Datastore "Tier 1"
Create a new drive:
New-PSDrive -Location $ds -Name ds -PSProvider VimDatastore -Root '\'
Navigate to the datastore:
cd ds:
Create a folder called productLocker:
New-Item productLocker -Type Directory
Connect to the first host (which at this point should be the only one powered on) using SSH and copy the contents of the existing productLocker to the shared folder:
cp -R /productLocker/* "/vmfs/volumes/Tier 1/productLocker"
Update the first host to use the new location (substitute according):
Get-VMhost -Location | Set-VMHostAdvancedConfiguration -Name “UserVars.ProductLockerLocation” -Value “/vmfs/volumes/Tier 1/productLocker”
Finally, reboot the host for the setting to take effect.
Logging
Hosts that boot from Auto Deploy don’t have a scratch partition, therefore all logs need to be redirected to a centralised syslog server.
Connect to the first host using SSH and use the following command (substitute accordingly):
esxcli system syslog config set --loghost='udp://192.168.146.12:514'
Reload the syslog configuration:
esxcli system syslog reload
Configure the ESXi host firewall to allow outgoing syslog connections:
esxcli network firewall ruleset set --ruleset-id=syslog --enabled=true
Reload the firewall configuration:
esxcli network firewall refresh
Send a test message to verify the configuration works as expected:
esxcli system syslog mark -s "This is a test"
Memory Dumps
For the reasons listed above, when Auto Deployed hosts experience a kernel panic (Purple Screen of Death or PSOD), memory dumps are not saved. These dumps are critical when working with VMware to diagnose issues.
To redirect memory dumps to a central location use the following (substitute accordingly):
esxcli system coredump network set --interface-name vmk0 --server-ipv4 192.168.146.12 --server-port 6500
esxcli system coredump network set --enable true
Host Profile
Configure the first host with the required settings (DNS servers, NTP servers etc). Once finished, create a profile using that host as a template for the others.
User the following PowerCLI code to create the profile:
# Variables
$profile = "MyCluster_Profile"
$firsthost = Get-VMHost 192.168.146.110

# Create profile
New-VMHostProfile -Name $profile -ReferenceHost $firsthost
Apply the profile to the cluster:
# Variables

$MyCluster = Get-Cluster "MyCluster"
$profile = Get-VMHostProfile -Name $profile

# Apply the profile
Apply-VMHostProfile -AssociateOnly -Entity $MyCluster -Profile $profile -Confirm:$false
Power on the remaining hosts. They should all boot using Auto Deploy, and appear in vCenter in the relevant cluster.
Alerting
By default, ESXi hosts check for host profile compliance every twenty four hours. In the event a host becomes non-compliant, this is noted on the host summary tab in vCenter. Whilst this is helpful, if an administrator does not notice this, the deviation will be missed.
In the event of configuration drift, an alert can be configured to highlight this. Use the following code to create the alert:
# Variables

$vc = "vcsa.lab.mdb-lab.com"
$credential = Get-Credential
$mailto = "virtualhobbit@mdb-lab.com"

# Connect to vCenter
Connect-VIServer $vc -credential $credential

# Get the Datacenter
$dc = "London"
$entity = Get-Datacenter $dc | Get-View

# Create the alarmspec object
$spec = New-Object VMware.Vim.AlarmSpec
$spec.name = "Host profile deviation"
$spec.description = "Monitors host profile deviation"
$spec.enabled = $true

# Expression 1 - Host profile is non-compliant
$spec.expression = New-Object VMware.Vim.OrAlarmExpression
$spec.expression.expression = New-Object VMware.Vim.AlarmExpression[] (1)
$spec.expression.expression[0] = New-Object VMware.Vim.EventAlarmExpression
$spec.expression.expression[0].eventType = "HostNonCompliantEvent"
$spec.expression.expression[0].objectType = "HostSystem"
$spec.expression.expression[0].status = "red"

# Create the alarm action
$spec.action = New-Object VMware.Vim.GroupAlarmAction
$spec.action.action = New-Object VMware.Vim.AlarmAction[] (1)
$spec.action.action[0] = New-Object VMware.Vim.AlarmTriggeringAction
$spec.action.action[0].action = New-Object VMware.Vim.SendEmailAction
$spec.action.action[0].action.toList = $mailto
$spec.action.action[0].action.ccList = ""
$spec.action.action[0].action.subject = "Host non-compliant with profile"
$spec.action.action[0].action.body = ""
$spec.action.action[0].transitionSpecs = New-Object VMware.Vim.AlarmTriggeringActionTransitionSpec[] (1)
$spec.action.action[0].transitionSpecs[0] = New-Object VMware.Vim.AlarmTriggeringActionTransitionSpec
$spec.action.action[0].transitionSpecs[0].startState = "yellow"
$spec.action.action[0].transitionSpecs[0].finalState = "red"
$spec.action.action[0].transitionSpecs[0].repeats = $false
$spec.action.action[0].green2yellow = $false
$spec.action.action[0].yellow2red = $false
$spec.action.action[0].red2yellow = $false
$spec.action.action[0].yellow2green = $false

$spec.setting = New-Object VMware.Vim.AlarmSetting
$spec.setting.toleranceRange = 0
$spec.setting.reportingFrequency = 0

$_this = Get-View -Id 'AlarmManager-AlarmManager'

# Create alarm
$_this.CreateAlarm($entity.MoRef, $spec)

# Disconnect from vCenter
Disconnect-VIServer $vc -Confirm:$false
While receiving an alert is important, it’s even more so to receive it quickly. In vCenter, select the Scheduled Tasks tab from the Home screen. Right-click the Scheduled compliance check… task and click Properties:
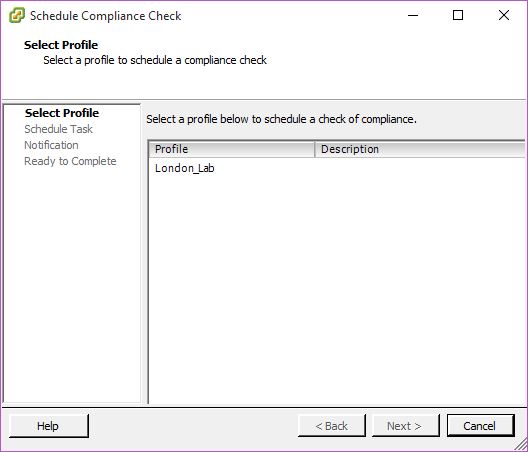
Click the profile, and then click Next >
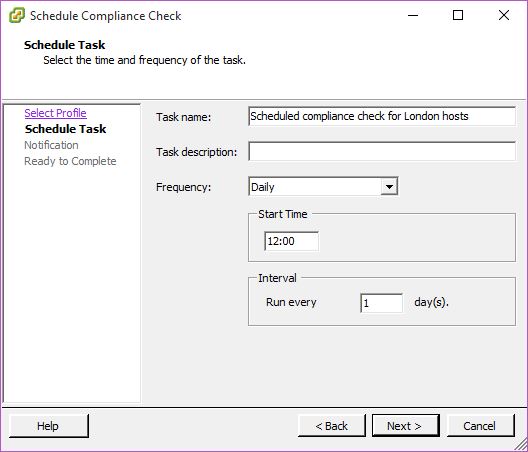
Click the Frequency dropdown box and select Hourly. Click Next >
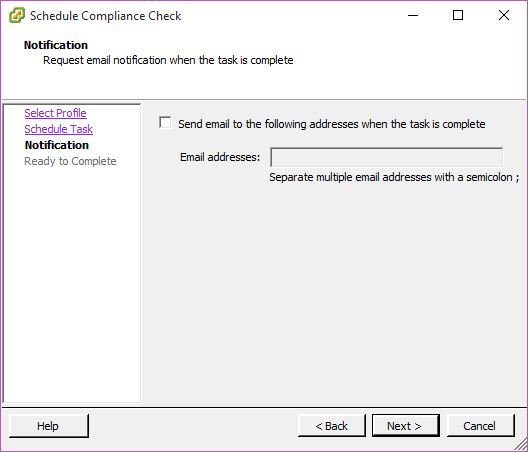
Click Next>

Click Finish.
Patching
The biggest advantage to using Stateless Auto Deploy is the ability to effortlessly update hosts to a newer version. In the following example, we will create an Auto Deploy rule to update the existing cluster hosts to ESXi 5.5 Update 3.
On your workstation, open PowerCLI. Connect to the vCenter using the following code (substitute as necessary):
# Variables
$vc = "vc2.uk.mdb-lab.com"
$credential = Get-Credential

Connect-VIServer $vc -Credential $credential
Set the execution policy:
Set-ExecutionPolicy Unrestricted
View the active ruleset:
Get-DeployRuleSet
Navigate to the depot folder:
cd C:\Depot
Copy across ESXi 5.5 Update 3 offline bundle to C:\Depot and then add it:
Add-EsxSoftwareDepot C:\Depot\update-from-esxi5.5-5.5_update03.zip
Verify the correct image is there:
Get-EsxImageProfile | ft Name
Use a variable to specify the new image:
$updateimg = Get-EsxImageProfile -Name "ESXi-5.5.0-20150902001-no-tools"
Assign a variable for your cluster:
$MyCluster = Get-Cluster "London_Cluster"
Create a new deploy rule for ESXi 5.5 Update 3:
$updatedeployrule = New-DeployRule -Name “5.5 Update 3” -Item $updateimg,$MyCluster -Pattern “ipv4=192.168.146.110-192.168.146.120″
Add the deploy rule to the Active Set:
Get-DeployRule -Name "5.5 Update 3" | Add-DeployRule
This will now show both rules:

Unfortunately the new rule is lower than the existing rule, which means it will not yet take effect. Use the following to modify the rule order:
Get-DeployRule -Name "5.5 Update 3" | Set-DeployRuleSet
If we list the Active Set, we should see the following:

To update each host to ESXi 5.5 Update 3, all that is needed now is a simple reboot!
Conclusion
In this short series of articles we have demonstrated provisioning ten hosts using Auto Deploy for what will eventually be a separate cluster for VMware View. However, using Auto Deploy is not suitable in all scenarios. As mentioned previously, Auto Deploy relies on a number of other technologies (DHCP, TFTP etc.) – if these technologies run inside virtual machines that will reside on your Auto Deployed hosts, how will you bring them up if your hosts aren’t even available?
By leveraging other technologies such as Host Profiles and custom alarms, we can create an environment which is resistant to configuration drift.
