 At VMworld 2017 VMware announced the latest release of vSphere Integrated Containers, version 1.2. This release also included updated versions Admiral, VMware’s container management platform; and Harbor, their enterprise-class container registry. VMware makes all these products available to consume from a single OVA which can be
downloaded from their site. However sometimes companies only need to access to one product, as they may already be running others in another manner – such as using the version of Admiral baked into vRealize Automation.
Harbor is an enterprise-class registry server that stores and distributes Docker images. It features user management, role-based access control, auditing and image scanning. By implementing it in your environment you can distribute safe and secure images to your developers.
Getting started
In this short series I will take you through how to deploy and configure Harbor as a standalone product, and how you can configure it to scan container images for vulnerabilities, ensuring your users only consume images you are sure are secure.
Other posts in this series:
- Building Harbor
- Image scanning with Harbor and Clair
In the following example I will be using CentOS 7.3. It is a fresh build that is configured to point to the authoritative NTP and Spacewalk servers.
Install pre-reqs
The following pre-reqs need to be installed:
- Docker Community Edition
- Docker Compose
Logon to your CentOS server and install the following:
yum install -y yum-utils device-mapper-persistent-data lvm2
Add the Docker repo:
yum-config-manager --add-repo https://download.docker.com/linux/centos/docker-ce.repo
Install Docker:
yum install -y docker-ce
Add firewall rules to enable communication over HTTPS:
firewall-cmd --zone=public --add-port=443/tcp --permanent
firewall-cmd --reload
Enable and start the service:
systemctl enable docker
systemctl start docker
Install Docker Compose:
curl -L https://github.com/docker/compose/releases/download/1.16.1/docker-compose-`uname -s`-`uname -m` -o /usr/local/bin/docker-compose
Make it executable:
chmod +x /usr/local/bin/docker-compose
Check Docker Compose is installed correctly:
docker-compose --version
Install Harbor
Now the pre-reqs are in place we can install Harbor. Begin by browsing to the Harbor site on GitHub, which can be found at https://github.com/vmware/harbor/releases.
Download the online installer and extract the files using:
tar xvf harbor-online-installer-<version>.tgz
Edit harbor.cfg to suit your needs. In my example, I changed the following values:
- hostname
- ui_url_protocol
- db_password
- ssl_cert
- ssl_cert_key
- email_server
- email_from
- harbor_admin_password
Once you have made the changes, begin the installation using:
./install.sh --with-clair
The installer will then proceed to pull down the container images it requires:

Run Forest, run!
When it has finished you should see the following:

Finished
Finally, browse to your installation and login:

vRealize Automation Blueprint
If you’re interested in letting your developers/consume Harbor, and would like them to deploy their own instances from vRealize Automation, then I have created a blueprint that you can use.
It can be found at https://github.com/virtualhobbit/blueprints/blob/master/Harbor12-composite-blueprint.zip.
To get it working in your environment you need to:
- Map the vSphere Machine to a CentOS template with Gugent installed
- Re-map VLAN50 to an external network of your choosing
- Configure the passwords on the Harbor software component
- Create a custom property of type string, with a drop-down box for multiple Harbor values
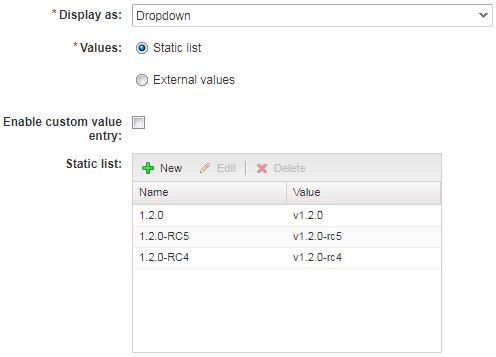
Would be nice to dynamically populate this list from the Harbor GitHub site
Coming up
In this short part we installed and configured VMware Harbor 1.2. In part two we configure Harbor to scan container images using Clair.

Pingback: Newsletter: October 21, 2017 | Notes from MWhite
Pingback: Building containerized apps through vRealize Automation | virtualhobbit