 In part 8 we installed and configured the vRealize Automation Appliance into the lab.
In this part we deploy and configure the IaaS platform. This will involve building a Windows Server VM and installing the requisite components. Once done, we will secure the platform with an SSL certificate from our Certificate Authority.
Other posts in this series
- Intro
- Physical infrastructure – storage
- Physical infrastructure – networking
- Physical infrastructure – compute
- Authentication services
- Deploy and configure the vCenter Server Appliance
- Configure vCenter Server Appliance SSL certificates
- Deploy and configure the vRA Appliance
- Deploy and configure the IaaS platform
- Configure tenants
- Configure endpoint & fabric/business groups
- onfigure blueprints (coming soon)
- Configure entitlements (coming soon)
- Configure policies (coming soon)
- Integration with vCloud Air (coming soon)
- Tidy up (coming soon)
Build the Iaas Server
Create the following script and save it as build_iaas.ps1:
# Variables

$vc = "vcsa.lab.mdb-lab.com"
$credential = Get-Credential
$cluster = "London_Lab"
$vmName = "iaas.lab.mdb-lab.com"
$numCPU = "2"
$numMem = "4096"
$numDisk = "51200"
$ds = "iSCSI"
$vmdkFormat = "Thick"
$net = "London Management VMs"
$guestOS = "windows8Server64Guest"
$ver = "v10"
$iso = "en_windows_server_2012_r2_with_update_x64_dvd_4065220.iso"
$cdpath = "[$ds] $iso"

Connect-VIServer $vc -credential $credential

$myCluster = Get-Cluster -Name $cluster

#Create VM
New-VM -name $vmName -ResourcePool $myCluster -numcpu $numCPU -memoryMB $numMem -DiskMB $numDisk -datastore $ds -DiskStorageFormat $vmdkFormat -Network $net -guestID $guestOS -cd -Version $ver

# Set network adapter to VMXNET3
Get-NetworkAdapter -VM $vmName | Set-NetworkAdapter -Type vmxnet3 -Confirm:$false

# Add CD drive with ISO
Get-CDDrive -VM $vmName | Set-CDDrive -IsoPath $cdpath -StartConnected $true -Confirm:$false

Disconnect-VIServer $vc -confirm:$false
Open PowerCLI, set the execution policy and run the script:
Set-ExecutionPolicy Unrestricted
.\build_iaas.ps1
Install Windows Server 2012 R2 . Set the Administrator password, patch the OS and assign an IP address. For the LAN address I have used 192.168.146.207, with a subnet mask of 255.255.255.0.
Domain Account
On the domain controller, create a service account for vRealize Automation using the following:
dsadd user cn=sa_vra_iaas,cn=users,dc=lab,dc=mdb-lab,dc=com -disabled no -pwd * -acctexpires never
Back on the IaaS server, add the user account to the local administrators group:
net localgroup Administrators /ADD sa_vra_iaas@lab.mdb-lab.com
Windows Pre-requisites
Once the server has rebooted, login and download Brian Graf‘s vRealize Automation (vRA) 6.2 Pre-Req Automation Script and save as prereqs.ps1. This can be found at http://blogs.vmware.com/PowerCLI/2014/12/vrealize-automation-vra-6-2-pre-req-automation-script-formerly-vcac.html.
Run the script:
Set-ExecutionPolicy Unrestricted
.\prereqs.ps1
This will install the necessary components to support an IaaS installation:
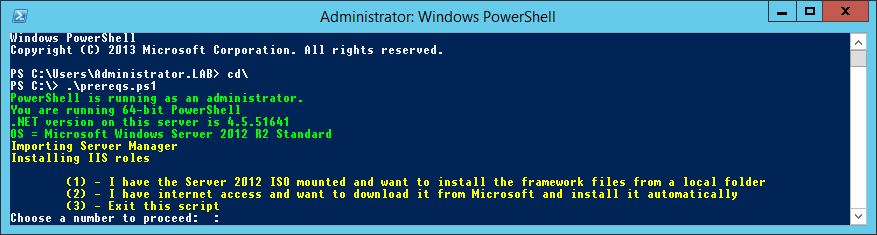
Press 2 then enter:

Press 2 and then enter:

Enter “LAB\sa_vra_iaas” (minus quotes) and press enter (substitute accordingly):
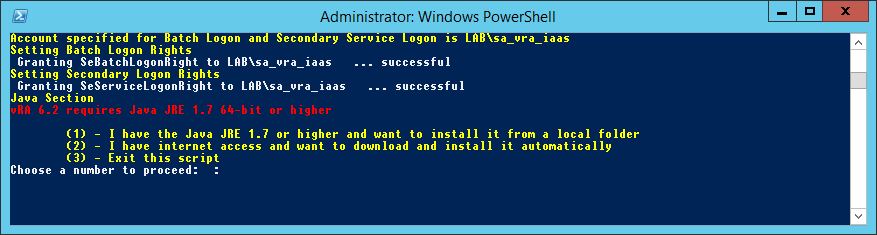
Press 2 and then enter:

The script has now finished.
IaaS Installer
Once the components have been installed, download the IaaS installer from the vRealize Automation Appliance. Using PowerShell:
$url = "https://vra.lab.mdb-lab.com:5480/installer/setup__vra.lab.mdb-lab.com@5480.exe"
$path = "C:\Temp\setup__vra.lab.mdb-lab.com@5480.exe"
(New-Object System.Net.WebClient).DownloadFile($url, $path)
Do not rename the saved file – the installer is very picky on what it is called.
Run the saved file:

Click Next >

Check the I accept the terms in the license agreement box and click Next >
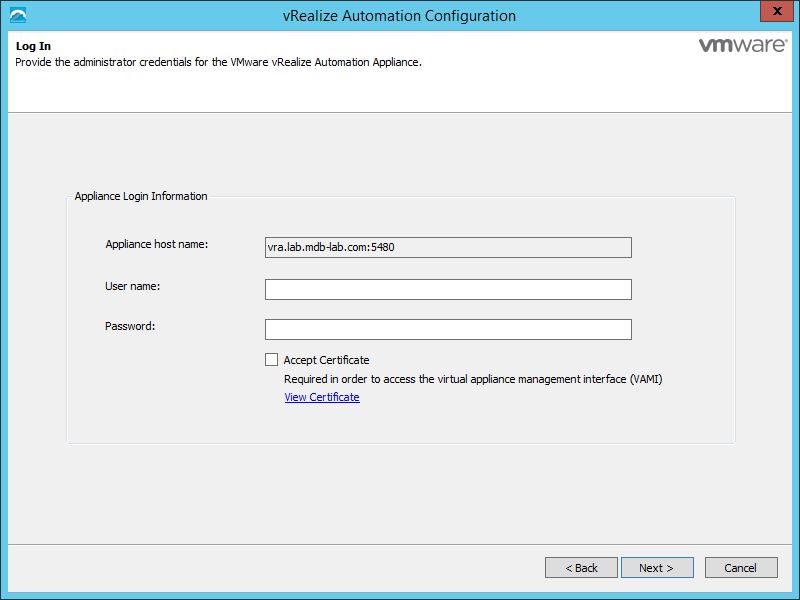
Type root in the User name box and the password you set previously. Check the box Accept certificate:

Click Next >

Click Next >
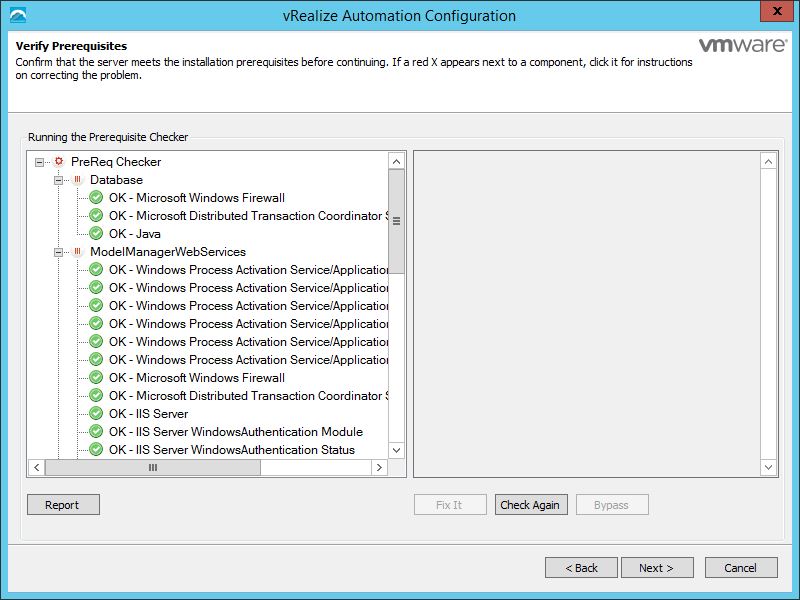
All tests should report as being satisfied. If not, remediate as necessary. Click Next >

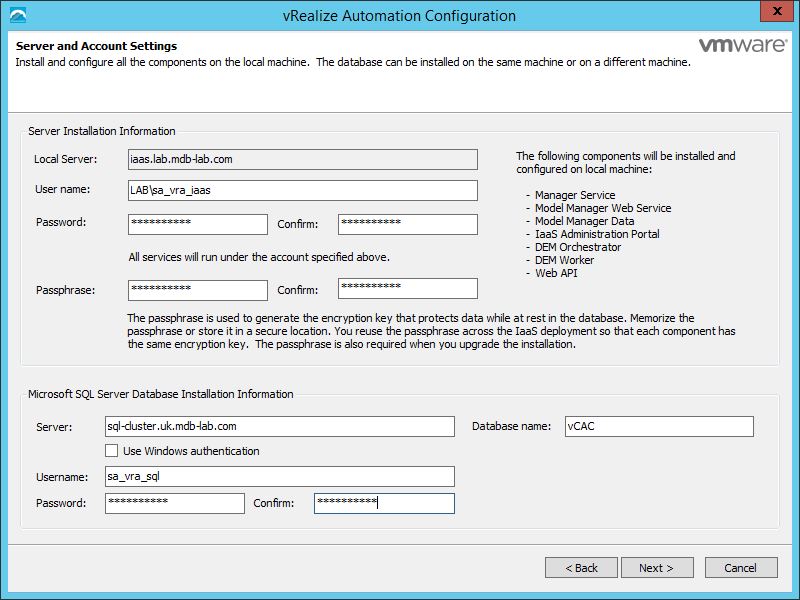
Enter the domain account we created previously in the User name box, along with the password twice. Type a passphrase in the box below, and again to confirm.
If you’re using an external SQL server, type the name of the server in the Server box along with the necessary credentials. If you wish to use SQL Server Express then no further details are necessary.
Click Next >

Click Next >
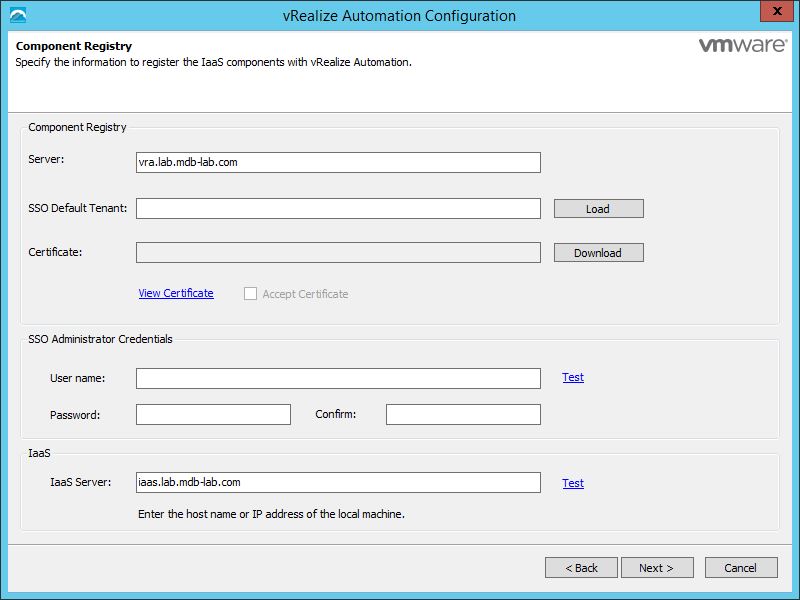
Click Load and then click Download, followed by Accept Certificate:
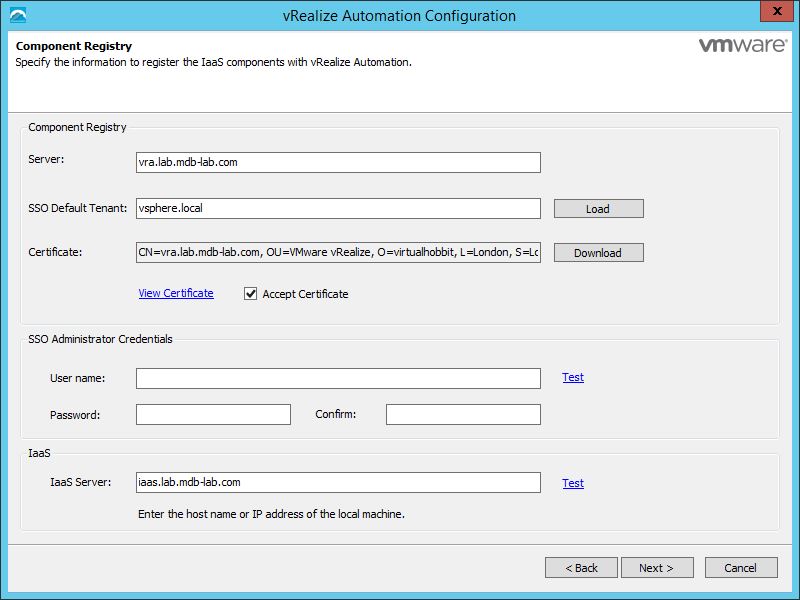
Enter Administrator@vsphere.local in the User name box, along with the password twice. Click Test:
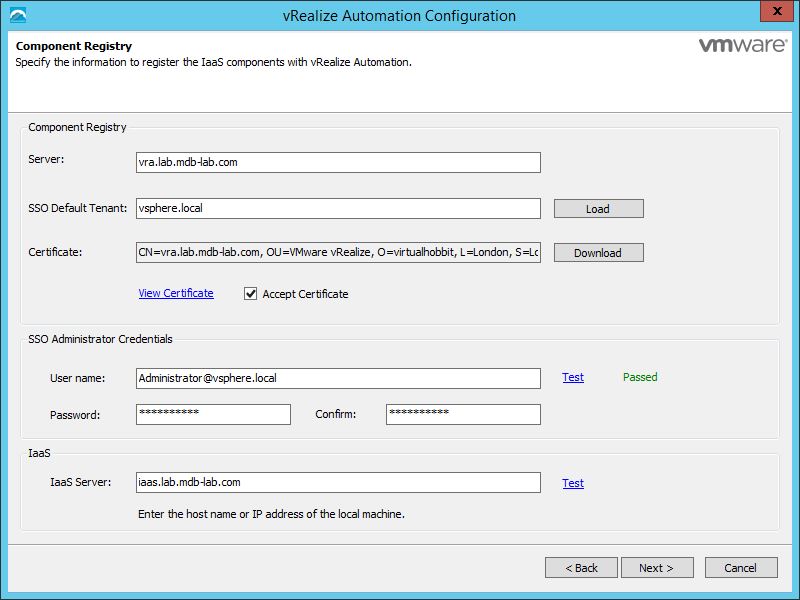
Click the second Test button:

Click Next >

Click Install.

Click Next >

Untick the Guide me through the initial system configuration box and then click Finish.
SSL Certificate
On your workstation/laptop, create the following configuration file and save as C:\Certs\iaas.cfg:
[ req ]
default_md = sha512
default_bits = 2048
default_keyfile = rui.key
distinguished_name = req_distinguished_name
encrypt_key = no
prompt = no
string_mask = nombstr
req_extensions = v3_req
input_password = VMware1!
output_password = VMware1!

[ v3_req ]
basicConstraints = CA:false
keyUsage = digitalSignature, keyEncipherment, dataEncipherment
extendedKeyUsage = serverAuth, clientAuth
subjectAltName = DNS:iaas, IP: 192.168.146.207, DNS: iaas.lab.mdb-lab.com

[ req_distinguished_name ]
countryName = UK
stateOrProvinceName = London
localityName = London
0.organizationName = virtualhobbit
organizationalUnitName = VMware vRealize
commonName = iaas.lab.mdb-lab.com
Create a certificate signing request:
C:\OpenSSL\bin\openssl req -new -nodes -out C:\Certs\iaas.csr -keyout C:\Certs\iaas-orig.key -config C:\Certs\iaas.cfg
Convert the private key to the appropriate RSA format required by the appliance:
C:\OpenSSL\bin\openssl rsa -in C:\Certs\iaas-orig.key -out C:\Certs\iaas.key
Submit the CSR to the Certificate Authority to generate the certificate:
certreq -submit -config "issuingca.mdb-lab.com\mdb-lab.com Issuing CA" -attrib "CertificateTemplate:VMwareSSL" C:\Certs\iaas.csr C:\Certs\iaas.crt
Create PFX file:
C:\OpenSSL\bin\openssl pkcs12 -export -in C:\Certs\iaas.crt -inkey C:\Certs\iaas.key -certfile C:\Certs\cachain.pem -name “rui” -passout pass:VMware1! -out C:\Certs\iaas.pfx
Copy the PFX file across to the IaaS server. Import the certificate:
certutil -p VMware1! -importPFX iaas.pfx
Change the IIS bindings to use the new certificate. Using the following PowerShell code:
$thumb = (Get-ChildItem -Path Cert:\LocalMachine\My | Where-Object {$_.FriendlyName -match "rui"}).Thumbprint
Import-Module WebAdministration
cd IIS:\SslBindings
Get-Item Cert:\LocalMachine\My\$thumb | Set-Item 0.0.0.0!443
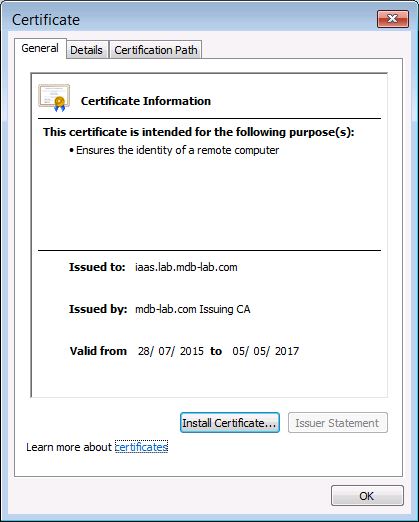
Verify the new certificate is in place by opening a web browser and navigating to https://iaas.lab.mdb-lab.com/vcac. You will receive a 401 error, but that can be ignored.
Navigate to the Cafe directory:
cd "C:\Program Files (x86)\VMware\vCAC\Server\Model Manager Data\Cafe"
Register the endpoint address:
Vcac-Config.exe RegisterEndpoint --EndpointAddress https://iaas.lab.mdb-lab.com/vcac/ --Endpoint ui -v
Register the endpoint address for the Model Manager Web Server:
Vcac-Config.exe RegisterEndpoint --EndpointAddress https://iaas.lab.mdb-lab.com/Repository --Endpoint repo -v
Register the endpoint address for the WAPI server:
Vcac-Config.exe RegisterEndpoint --EndpointAddress https://iaas.lab.mdb-lab.com/WAPI --Endpoint wapi -v
Register the address for the status endpoint:
Vcac-Config.exe RegisterEndpoint --EndpointAddress https://iaas.lab.mdb-lab.com/WAPI/api/status --Endpoint status -v
Restart the service:
sc stop "VMware vCloud Automation Center Service"
sc start "VMware vCloud Automation Center Service"
Coming up
In this part we installed and configured the vRealize Automation IaaS platform. We installed all the necessary pre-requisites before using the installer to configure the software. Finally we secured the platform with a proper SSL certificate.
In part 10 we configure the default tenant and create a new one for our lab users.
