 In part 1 of this series, I outlined the design for implementing a virtual desktop infrastructure solution using VMware View. In this part, I demonstrate how to install and configure the VMware View Connection Server and View Composer in preparation for deploying virtual desktops.
Other posts in this series:
- Design
- Installing the Connection Servers and Composer
- Creating the templates
- Configuring the RDS hosts
- Pool configuration
- Application farm configuration
- Load-balancing
- Remote access
The View Connection Server acts as a broker for client connections by authenticating and then directing incoming user requests to the appropriate virtual desktop (or physical desktop/terminal server).
View Composer is a software service that allows View to rapidly deploy multiple linked-clone desktops from a single centralised base image.
At the time of writing, the current version of VMware Horizon View is 6.2.1. However before we can install either the Connection Server or Composer there are a few things we need to configure first.
Getting started
As per the design, three View Connection Servers will be used (see part 1, D38). Create four virtual machines (view1, view2, view3 and composer) in your vSphere environment.
For each machine I have used the following virtual hardware, but please refer to the server maximums at https://pubs.vmware.com/horizon-62-view/index.jsp:
- 4 vCPU
- 16GB RAM
- 50GB hard disk
- 1 vNIC
- VMXNET3 NIC type
Install Windows Server 2012 R2 on each server and patch with the latest updates. Install VMware Tools and then add to the Active Directory domain.
SSL certificates
On your workstation, download and install OpenSSL 0.9.8 for Windows if you don’t already have it. You can download it from http://slproweb.com/products/Win32OpenSSL.html. Ensure you modify your system path variable to include the OpenSSL bin folder (this will require a reboot to take effect).
The following assumes a Certificate Authority is in place (see part 1, Assumptions, A4), along with a certificate template called “VMwareView”. For assistance on how to create a template for View, please refer to Derek Seaman’s excellent guide at http://www.derekseaman.com/2012/09/create-vmware-windows-ca-certificate.html.
Using PowerShell, download the certificate chain from your CA (substitute as necessary):
$certdir = "C:\certs"
$issuingCA = "issuingca.mdb-lab.com"
$wc = New-Object System.Net.WebClient
$wc.UseDefaultCredentials = $true
$chain = "$certdir\certnew.p7b"
$url = "https"+"://$issuingCA/certsrv/certnew.p7b?ReqID=CACert&Renewal=0&Enc=b64"

$wc.DownloadFile($url,$chain)
Convert the chain to PEM format:
$pemchain = "$certdir\certnew.pem"

openssl pkcs7 -print_certs -in $chain -out $pemchain
Remove-Item $chain
Remove unnecessary lines from PEM file:
$cachain = "$certdir\cachain.pem"

Get-Content $pemchain | Where { $_ -notmatch "subject" -and $_ -notmatch "issuer"} | Set-Content $cachain
(Get-Content $cachain) | ? {$_.trim() -ne "" } | Set-Content $cachain
Remove-Item $pemchain
Create the following file and save it as view1.cfg (substitute the highlighted lines accordingly):
[ req ]
default_bits = 2048
distinguished_name = req_distinguished_name
encrypt_key = no
prompt = no
string_mask = nombstr
req_extensions = v3_req

[ v3_req ]
basicConstraints = CA:false
keyUsage = digitalSignature, keyEncipherment, dataEncipherment
extendedKeyUsage = serverAuth, clientAuth
subjectAltName = DNS:view1, DNS: view1.nl.mdb-lab.com, IP: 172.17.95.51

[ req_distinguished_name ]
commonName = view1.nl.mdb-lab.com
Create a certificate signing request:
openssl req -new -nodes -out view1.csr -keyout view1.key -config view1.cfg
Submit the CSR to the certificate authority to generate the certificate:
certreq -submit -config "issuingca.mdb-lab.com\mdb-lab.com Issuing CA" -attrib "CertificateTemplate:VMwareView" view1.csr view1.crt
Create PFX file:
openssl pkcs12 -export -in view1.crt -inkey view1.key -certfile cachain.pem -passout pass:VMware1! -out view1.pfx
Copy the PFX file to view1 and install it:
certutil -p VMware1! -importPFX view.pfx
Open a Microsoft Management Console and add the Certificates (Local Computer) snap-in. Expand the Personal sub-folder, and then click Certificates.

Right-click the imported certificate and click Properties:

In the Friendly Name field, type vdm:
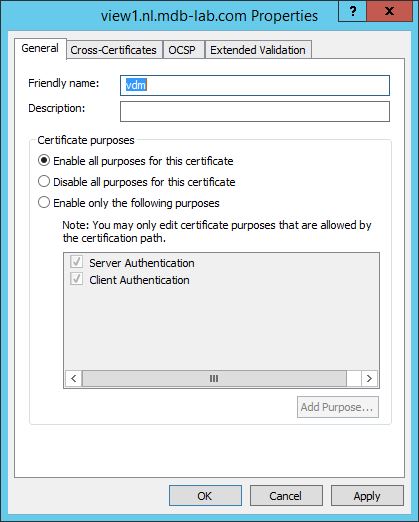
Click OK and close the MMC.
Please note: it is possible to set the friendly name when creating the pkcs12 container using the following:
openssl pkcs12 -export -in view1.crt -inkey view1.key -certfile cachain.pem -name "vdm" -passout pass:VMware1! -out view1.pfx
However for some reason this becomes corrupted when using certutil to import the file. When I have more time I plan to investigate this.
Repeat the above steps for the view2, view3 and composer virtual machines, editing the config file and modifying the commands accordingly. Install each certificate on each virtual machine.
Databases
We will need two SQL databases for our installation. The first will be the View Events database for the View Connection Server, the second will be the View Composer database.
Whilst the database requirements for the View Composer and Events Database do list SQL Server Express as a valid option, the design mandates the use a full version of Microsoft SQL Server (D39):

The requirements can be found at https://pubs.vmware.com/horizon-62-view/index.jsp#com.vmware.horizon-view.installation.doc/GUID-5B2266B8-EA3C-4F49-BABB-2D0B91DE6C1D.html.
The design assumes a Microsoft SQL Server is in place (A8). Whilst one is available, it is not clustered or configured for an Availability Group, which violates the requirement that ensures there are no single points of failure (R2). This must also be added to the risk register.
On your workstation, open SQL Server Management Studio and connect to the SQL Server. Once connected, run following script to create the View Event database and associated user (substitute username and password on line 4 accordingly):
USE [master]
GO

CREATE LOGIN [sa_viewevents] WITH PASSWORD='VMware1!', CHECK_EXPIRATION=OFF, CHECK_POLICY=OFF
GO

CREATE DATABASE [ViewEvents]
GO

ALTER DATABASE [ViewEvents] MODIFY FILE
( NAME = N'ViewEvents' , SIZE = 512MB , MAXSIZE = UNLIMITED, FILEGROWTH = 1024KB )

GO

ALTER DATABASE [ViewEvents] MODIFY FILE
( NAME = N'ViewEvents_log' , SIZE = 256MB , MAXSIZE = UNLIMITED , FILEGROWTH = 10%)
GO

ALTER DATABASE [ViewEvents] SET RECOVERY SIMPLE
GO

ALTER AUTHORIZATION ON DATABASE::ViewEvents TO sa_viewevents
GO

ALTER LOGIN [sa_viewevents] WITH DEFAULT_DATABASE=[ViewEvents]
GO
A database and user must also be created for View Composer. Use the following:
USE [master]
GO

CREATE LOGIN [sa_viewcomposer] WITH PASSWORD='VMware1!', CHECK_EXPIRATION=OFF, CHECK_POLICY=OFF
GO

CREATE DATABASE [ViewComposer]
GO

ALTER DATABASE [ViewComposer] MODIFY FILE
( NAME = N'ViewComposer' , SIZE = 512MB , MAXSIZE = UNLIMITED, FILEGROWTH = 1024KB )

GO

ALTER DATABASE [ViewComposer] MODIFY FILE
( NAME = N'ViewComposer_log' , SIZE = 256MB , MAXSIZE = UNLIMITED , FILEGROWTH = 10%)
GO

ALTER DATABASE [ViewComposer] SET RECOVERY SIMPLE
GO

ALTER AUTHORIZATION ON DATABASE::ViewComposer TO sa_viewcomposer
GO

ALTER LOGIN [sa_viewcomposer] WITH DEFAULT_DATABASE=[ViewComposer]
GO
Domain accounts
For the installation we will need two Active Directory domain accounts. The first will be used by Horizon View to connect to vCenter. The second will be to connect to the View Composer server.
On a domain controller, open an elevated command prompt and create two accounts using:
for %i in (sa_view,sa_viewcomposer) do dsadd user cn=%i,cn=users,dc=nl,dc=mdb-lab,dc=com -disabled no -pwd * -acctexpires never
A group will also be needed to grant View Administrators access. Create a group using (substitute accordingly:
dsadd group cn="View Admins",cn=users,dc=nl,dc=mdb-lab,dc=com -scope g
On composer, add the service account to the local administrators group using the following (also from an elevated command prompt):
net localgroup Administrators /ADD sa_viewcomposer@nl.mdb-lab.com
vCenter account
VMware Horizon View will need to connect to your vCenter server to perform provisioning operations. To do this we will create a new role for the account and grant it the necessary permissions. Finally we will assign a domain account to the role.
On your workstation, download and install PowerCLI if you don’t already have it. At the time of writing, PowerCLI 6.0 R3 is the latest version available, and is available from https://my.vmware.com/group/vmware/details?productId=491&downloadGroup=PCLI600R3.
To create an account on your vCenter Server with the appropriate permissions, use the following script (substitute the details on lines 4 & 5 accordingly):
# Variables

$credential = Get-Credential
$role = "VMware View"
$viewAccount = "NL\sa_view"

# Enter the vCenter name
$vc = Read-Host "Enter the vCenter Server name"

# Connect to vCenter
Connect-VIServer -Server $vc -Credential $credential

# Define privilege
$priv = Get-VIPrivilege -ID Folder.Create,Folder.Delete,VirtualMachine.Config.AddRemoveDevice,VirtualMachine.Config.AdvancedConfig,VirtualMachine.Config.EditDevice,VirtualMachine.Interact.PowerOff,VirtualMachine.Interact.PowerOn,VirtualMachine.Interact.Reset,VirtualMachine.Interact.Suspend,VirtualMachine.Inventory.Create,VirtualMachine.Inventory.Delete,VirtualMachine.Provisioning.Customize,VirtualMachine.Provisioning.DeployTemplate,VirtualMachine.Provisioning.ReadCustSpecs,Resource.AssignVMToPool,Global.VCServer

# Create role
New-VIRole -Name $role -Privilege $priv

# Define the root folder
$rootFolder = Get-Folder -NoRecursion

# Assign permission to domain account
$myPermission = New-VIPermission -Entity $rootFolder -Principal $viewAccount -Role $role -Propagate:$true

# Disconnect from VC
Disconnect-VIServer $vc -confirm:$false
View Connection Server
Download the VMware View Connection Server installer from VMware to view1, view2 and view3. At the time of writing the current version is 6.2.1, and the installer is VMware-viewconnectionserver-x86_64-6.2.1-3284346.exe.
Install the VMware View Connection Server on view1 using the following from an elevated command prompt (substitute password and password recovery accordingly):
VMware-viewconnectionserver-x86_64-6.2.1-3284346.exe /s /v"/qn VDM_SERVER_INSTANCE_TYPE=1 FWCHOICE=1 VDM_SERVER_RECOVERY_PWD="VMware1" VDM_SERVER_RECOVERY_PWD_REMINDER="You'll never guess""
After about ten minutes the installation will complete. When it has, event ID 1033 will appear in the application event log.
Install the View Connection Server on view2 using the following:
VMware-viewconnectionserver-x86_64-6.2.1-3284346.exe /s /v"/qn VDM_SERVER_INSTANCE_TYPE=2 FWCHOICE=1 ADAM_PRIMARY_NAME="view1.nl.mdb-lab.com""
Finally on view3, install the View Connection Server using:
VMware-viewconnectionserver-x86_64-6.2.1-3284346.exe /s /v"/qn VDM_SERVER_INSTANCE_TYPE=2 FWCHOICE=1 ADAM_PRIMARY_NAME="view1.nl.mdb-lab.com""
View Composer
Before we can install View Composer we need to perform a few steps first, such as install .NET 3.5 SP1 and configure an ODBC data source.
Switch to the composer virtual machine. If the operating system is Windows Server 2012 R2, ensure the Windows ISO is attached and open an elevated command prompt. Install .NET 3.5 using the following command:
dism /online /Enable-feature /Featurename:NetFX3 /Source:d:\sources\sxs /All
Download and install the SQL Server Native client from https://www.microsoft.com/en-us/download/details.aspx?id=27596.
Open Administrative Tools and then ODBC Data Sources (64-bit). Click the System DSN tab:
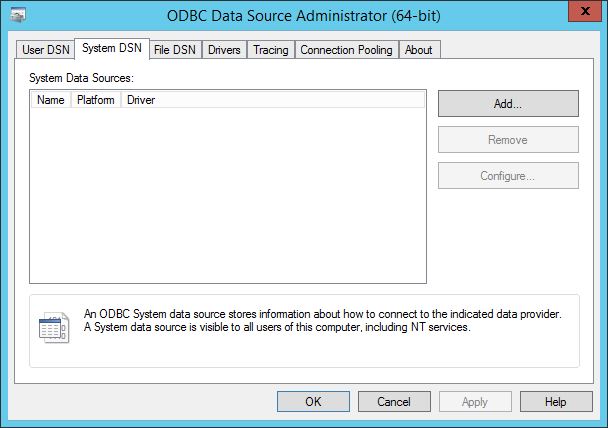
Click Add:

Click SQL Server Native Client 10.0 and then click Finish:

In the Name field type ViewComposer, and in the Server field type the name of your SQL Server, then click Next >

Click to select the radio-button With SQL Server authentication and then enter in the user accounts details configured above. Click Next >
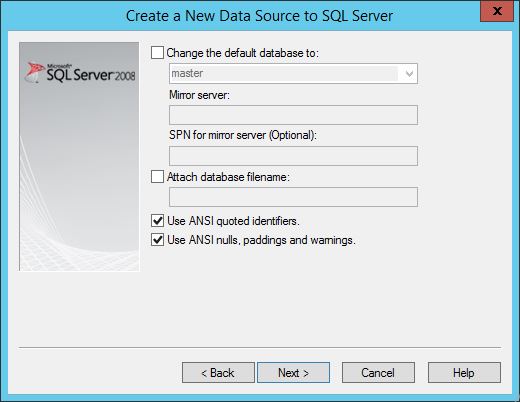
Click the box to change the default database, and from the drop-down box select ViewComposer. Click Next >

Click Finish.

Click Test Data Source. If the connection is successful, this will give:
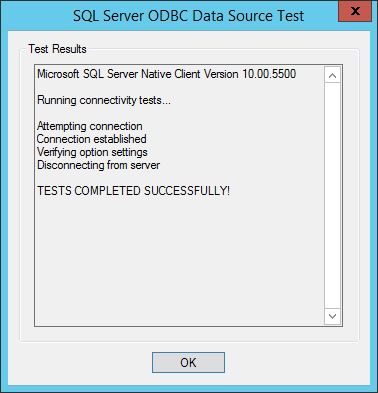
Click OK.
Begin the View Composer installation:

Click Next >
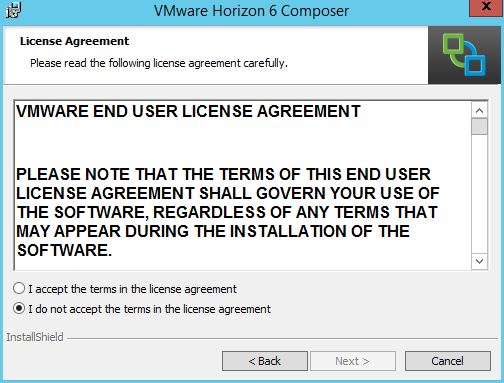
Select I accept the terms in the license agreement and click Next >

On the Destination Folder page, either accept the default or choose an alternative, and click Next >
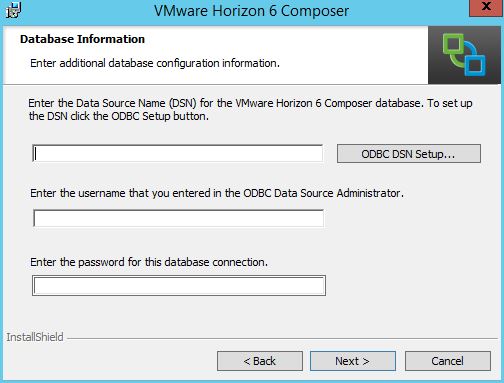
In the Data Source Name (DSN) field, type ViewComposer. In the username field enter sa_viewcomposer, and the password you entered previously in the remaining field.

Click Next >
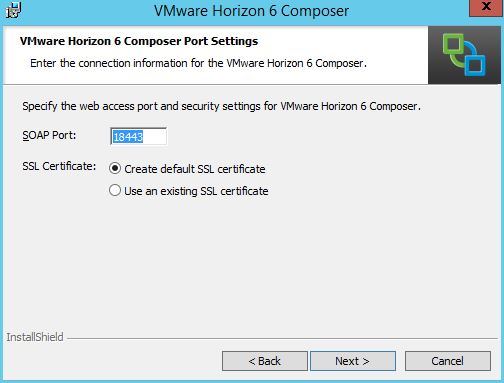
Click to select Use an existing SSL certificate, then click Choose. Select the appropriate certificate and click OK. Back on the VMware Horizon 6 Composer Port Settings, click Next >
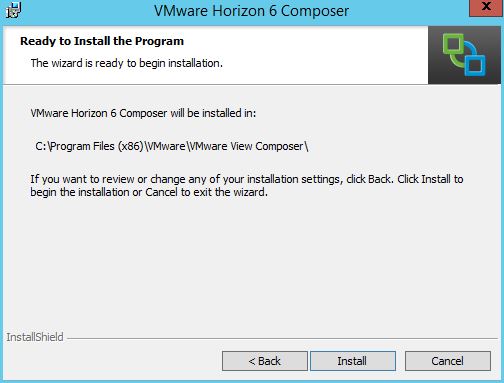
Click Install.

Finally click Finish. Click Yes to restart the system when prompted.
Initial configuration
Using a web browser, connect to the View Connection Server admin page at https://view1.nl.mdb-lab.com/admin (substitute accordingly):

Enter the username and password of a domain administrator and click Log In:

On the Licensing and Usage page, click Edit License. Enter your licence number and click OK:

On the left-hand side under View Configuration, click Servers. On the vCenter Servers tab, click Add…

Enter the Server address, User name and Password of your vCenter Server, using the details defined previously:

Click Next >

Click to select Standalone View Composer Server. In the Server address field, type the fully-qualified domain name for composer, and then enter the domain account details defined previously:

Click Next >

Click Next >

Click Next >

Click Finish.
On the left-hand side under View Configuration, click Event Configuration:

Click Edit…

Enter the necessary details into the Database Server, Database name, Password and Confirm password fields. In the Table prefix field, type VMW:

Click OK.

Finally, on the left-hand side under View Configuration, click Administrators, and then Add User or Group…

Click Add…

Click to uncheck Users, and in the Name/User field type then name of the group previously defined (View Admins in the example above). Click Find to select the group, then click OK.

Click Next >
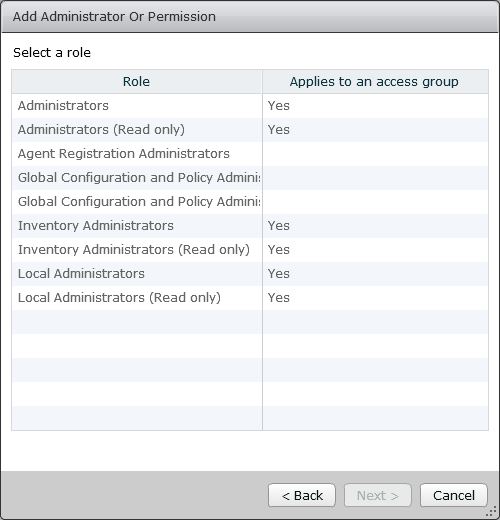
Click to select Administrators, then click Next >
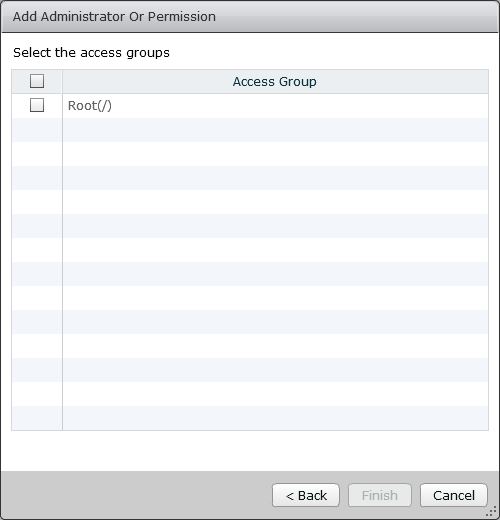
Click to check the box for Root, then click Finish.
Coming up
In this part we installed and configured the View Connection Servers and View Composer.
In part 3 we configure our templates for our virtual desktops.

Pingback: Implementing a VMware Virtual Desktop Infrastructure with Horizon View 6.2 – Part 1: Design | virtualHobbit
Pingback: Implementing a VMware Virtual Desktop Infrastructure with Horizon View 6.2 – Part 3: Creating the templates | virtualHobbit
Pingback: Implementing a VMware Virtual Desktop Infrastructure with Horizon View 6.2 – Part 4: Configuring the RDS hosts | virtualHobbit
Pingback: Implementing a VMware Virtual Desktop Infrastructure with Horizon View 6.2 – Part 6: Application farm configuration | virtualhobbit
Pingback: Implementing a VMware Virtual Desktop Infrastructure with Horizon View 6.2 – Part 7: Load-balancing | virtualhobbit
Pingback: Implementing a VMware Virtual Desktop Infrastructure with Horizon View 6.2 – Part 8: Remote access | virtualhobbit