 So far in the series we have installed the VMware View Connections Servers and Composer, and built two RDSH servers, all in preparation for deploying our virtual desktops. In this part I show how to configure the desktop pools to provision full desktops, linked clones, and applications to remote users.
Other posts in this series:
- Design
- Installing the Connection Servers and Composer
- Creating the templates
- Configuring the RDS hosts
- Pool configuration
- Application farm configuration
- Load-balancing
- Remote access
Before we provision any desktops, let’s remind ourselves of the pool configuration as defined in the design:

Each pool has been defined as having the following resources:

vCenter configuration
Before we can configure View to provision full desktops, we need to create a resource pool in the vCenter cluster. This will guarantee memory is reserved for these desktops and will decrease the amount of storage space needed.
The size of the VM swap file is equal to the VM memory allocation minus the reservation. If we configure a reservation to match the size of the allocation, we will reduce the VM swap file to zero.
Logon to the vCenter which will manage the virtual desktops. Right-click the target cluster and click New Resource Pool…

Give the resource pool a name to match the desktop pool. In the Reservation field under Memory Resources, type in the amount of memory you wish to reserve for that pool:
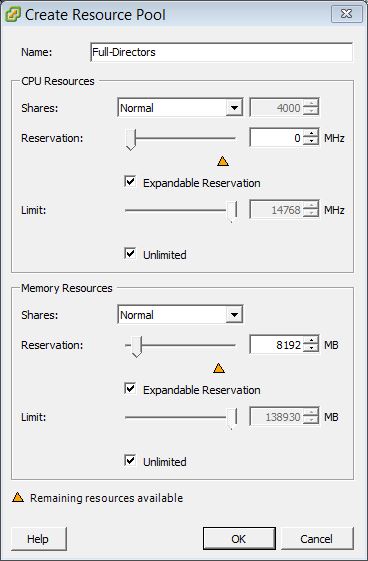
Click OK.
Repeat the process for the remaining pools (eg. Full-Developers-IT, Linked-CallCentre and Linked-Allusers).
Defining users
Users will need to be entitled to use the virtual desktops that are provisioned. In preparation for this we need to create four Active Directory groups.
On a domain controller, open an elevated command prompt and use the following (substitute accordingly):
for %i in ("Full-Directors","Full-Developers-IT","Linked-CallCentre","Linked-AllUsers") do dsadd group cn=VDI-%i,cn=users,dc=nl,dc=mdb-lab,dc=com -scope g
Provisioning full desktops – Directors
Logon to the View admin page at https://view1/admin (substitute accordingly):

In the left-hand pane, expand Catalog and followed by Desktop Pools. Click Add…

One of the key design requirements it that all desktop pools will be configured automatically (see part 1, D50). Ensure Automated Desktop Pool is selected and click Next >

Click Next >

Ensure Full virtual machines is selected and click Next >

In the ID field, enter Full-Directors. In the Display name field, type Directors:

Click Next >

The default settings are adequate for our design. Click Next >

In the naming pattern field, enter in a pattern for your desktops. For our design, we will use a pattern like:
Directors-01
To do that, enter Directors-{n:fixed=2}:

In the Max number of machines and Number of spare (powered on) machines fields type 5:

Click Next >

The design constraints state that the existing storage infrastructure must be used (see part 1, Constraints, C2), which is based on IBM XIV Gen3 hardware. Virtual SAN is not used.
Click Next >

Click Browse…

Select Full-Directors-20160127and click OK.
Under VM folder location, click Browse and then choose a location for the desktops.
Under Host or cluster, click Browse and then choose the destination cluster.
Under Resource pool, again click Browse…

Select Full-Directors and click OK.
Under Datastores, click Browse and choose a destination datastore:

Click Next >

Storage acceleration regeneration and VM disk space reclamation are great tools, but are also potentially resource intensive operations that are best suited to running outside of normal working hours.
Click Add, and then enter the blackout times you require. When done, click OK:

Click Next >

Select the customisation and click Next >

Click to select Entitle users after this wizard finishes and click Finish:
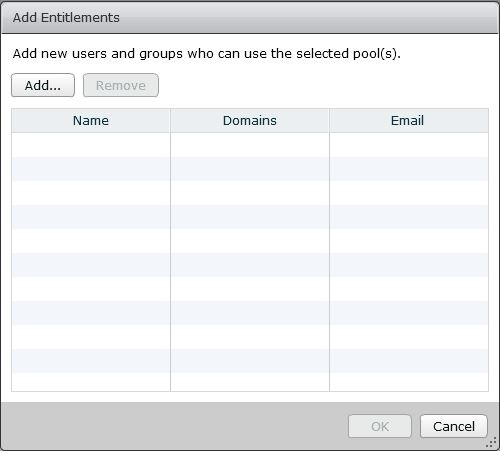
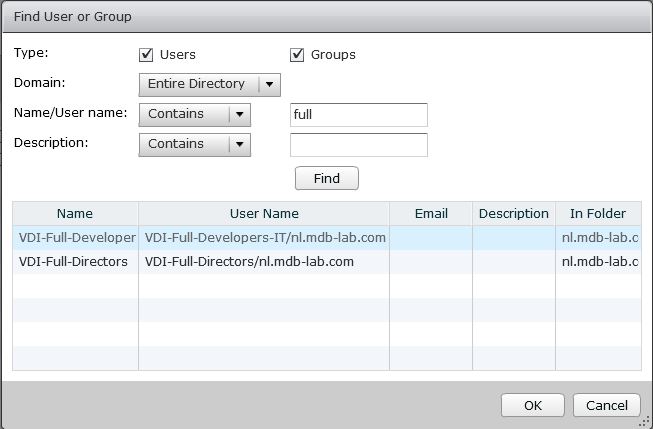
Click Add, and select the Full-Directors group created earlier, followed by OK.
Provisioning full desktops – Developers/IT
VMware Horizon View 6.0 introduced the ability to clone pools. This reduces the time required to create a new pool that matches an existing pool.
In the View admin page, highlight Full-Directors and click Clone. Continue through wizard until you reach the Desktop Pool Identification page. In the ID field type Full-Developers-IT, and in the Display name field type Developers-IT:

Click Next > to progress through the wizard until you reach the Provisioning Settings page. In the Naming pattern field type Development-{n:fixed=2}.
In the Max number of machines and Number of spare (powered on) machines fields, type 20.

Continue to click Next > through the wizard until the vCenter Settings page. Modify the Template and Resource pool options accordingly.
Continue through the wizard until the end. Click Finish, and then entitle the users:
Click OK.

Finally, click OK.
Provisioning linked clone desktops – Call Centre users
Unfortunately you cannot clone one pool type (such as full) to another (linked), so our two linked clone pools must be created from scratch.
Logon to the View admin page at https://view1/admin (substitute accordingly):

In the left-hand pane, expand Catalog and followed by Desktop Pools. Click Add…
Click Next >
Click Floating, followed by Next >

Click View Composer linked clones:

Click Next >

In the ID field, enter Linked-Callcentre. In the Display name field, type Callcentre:

Click Next >

Again the default settings are adequate for our design. Click Next >

In the naming pattern field, enter CallCentre-{n:fixed=3}:

In the Max number of machines field type 100. In the Number of spare (powered on) machines field type 90:

Click Next >

Click Next >

Click Next >

Click Browse…

Select Windows 10 Gold 32-bit and click OK.

Under Snapshot, click Browse…

Select Linked-Callcentre-20160127 and then click OK.
Choose the appropriate VM folder, host or cluster, resource pool and datastore(s) for this pool:

Click Next >

Under Blackout Times, click Add… then enter the blackout times you require. When done, click OK:

Under Transparent Page Sharing Scope, select Desktop Pool from the drop-down box and click Next >

Select the domain from the drop-down box, and click to select Use a customization specification (sysprep). Select your specification followed by Next >
On the Ready to Complete page, review the options and click Finish.
Provisioning linked clone desktops – All Users
Repeat the above steps to configure the linked clone desktop pool for the remaining 175 users. Use the following naming pattern for the pool:
All-{n:fixed=3}
Coming up
In this part we configured four desktop pools for our users – two full, two linked clone.
In part 6 we configure an application farm and associated pool for our applications.

Pingback: Implementing a VMware Virtual Desktop Infrastructure with Horizon View 6.2 – Part 4: Configuring the RDS hosts | virtualHobbit
Pingback: Implementing a VMware Virtual Desktop Infrastructure with Horizon View 6.2 – Part 3: Creating the templates | virtualHobbit
Pingback: Implementing a VMware Virtual Desktop Infrastructure with Horizon View 6.2 – Part 2: Installing the Connection Servers and Composer | virtualHobbit
Pingback: Implementing a VMware Virtual Desktop Infrastructure with Horizon View 6.2 – Part 1: Design | virtualHobbit
Pingback: Implementing a VMware Virtual Desktop Infrastructure with Horizon View 6.2 – Part 6: Application farm configuration | virtualhobbit
Pingback: Implementing a VMware Virtual Desktop Infrastructure with Horizon View 6.2 – Part 7: Load-balancing | virtualhobbit
Pingback: Implementing a VMware Virtual Desktop Infrastructure with Horizon View 6.2 – Part 8: Remote access | virtualhobbit